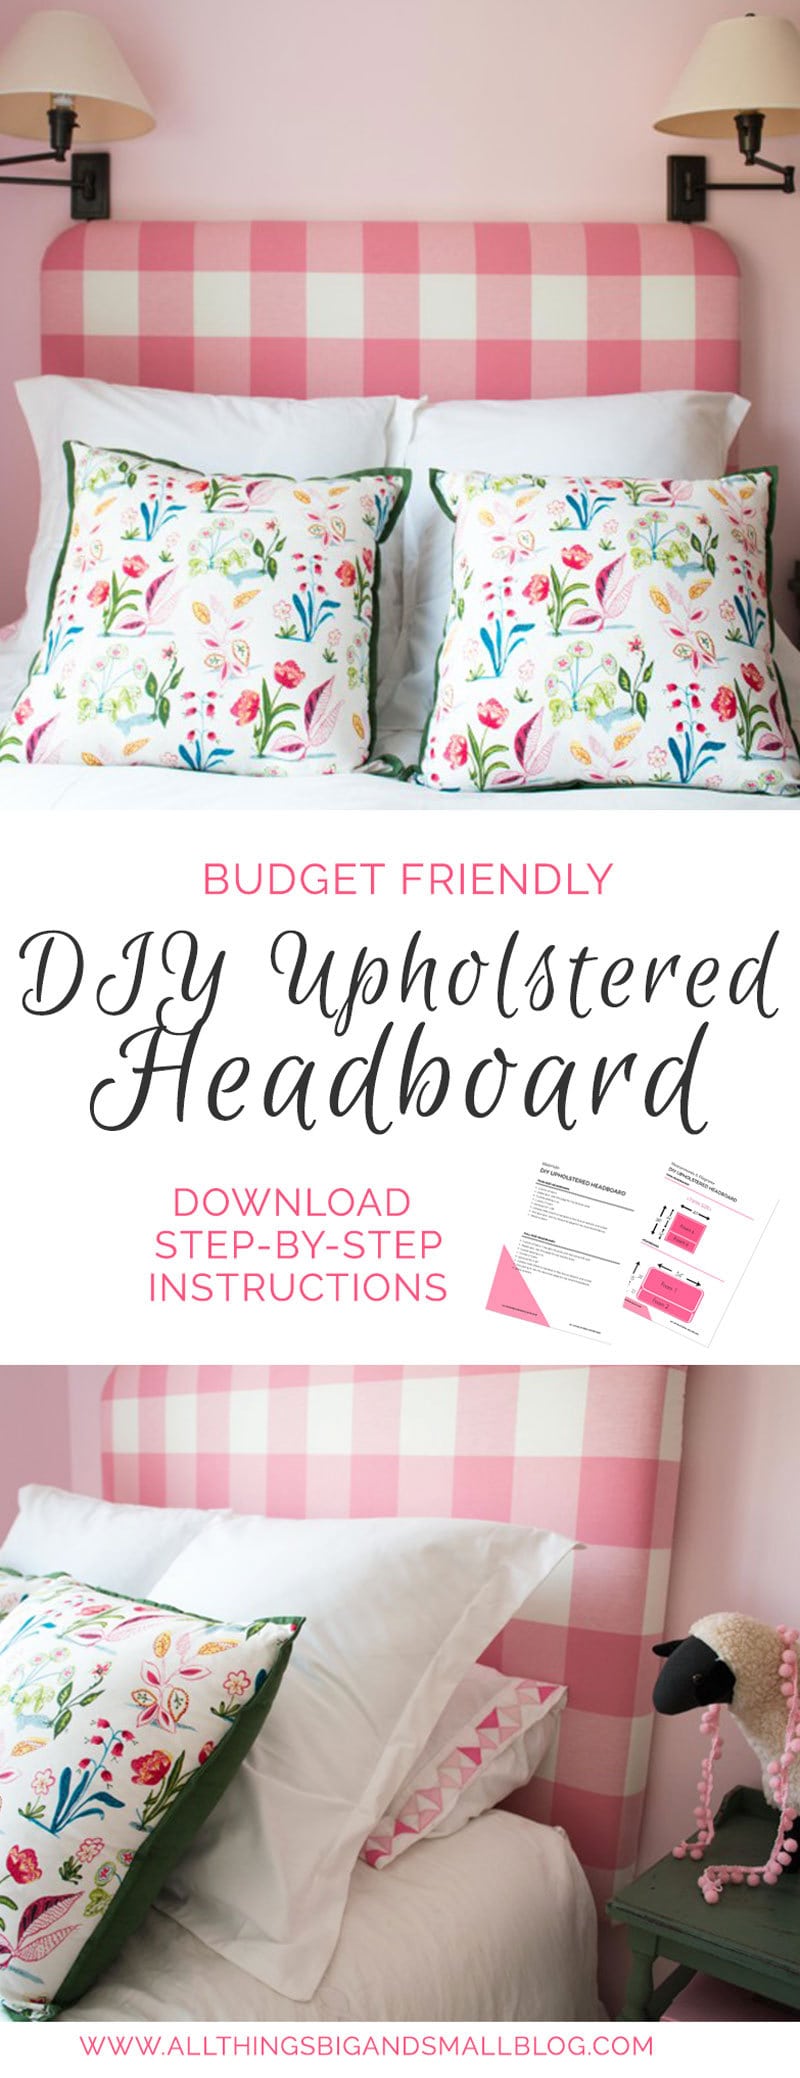
DIY Upholstered Headboard: Looking to make your own DIY Upholstered Headboard? This tutorial on how to make your own headboard will show you exactly how to do it yourself including printable step-by-step instructions!
DIY UPHOLSTERED HEADBOARD
Jump ahead to...
Unlike other DIY Upholstered Headboard tutorials, this one is not one that is made out of poster board and egg crate foam. This is a sturdy, plush, DIY Upholstered Headboard that will last for years. By using quality materials like 2″ foam and plywood, I ensured that this headboard would stand the test of time and look professional! If you want to make your own fabric headboard, download the instructions by clicking the button below–it has all the dimensions for king, queen, full, and twin size upholstered headboards that you can do yourself plus a cutting list, a diagram to show you how to lay the foam and all the steps!
*this post was previously published but has been improved and republished
HOW TO MAKE A FABRIC HEADBOARD
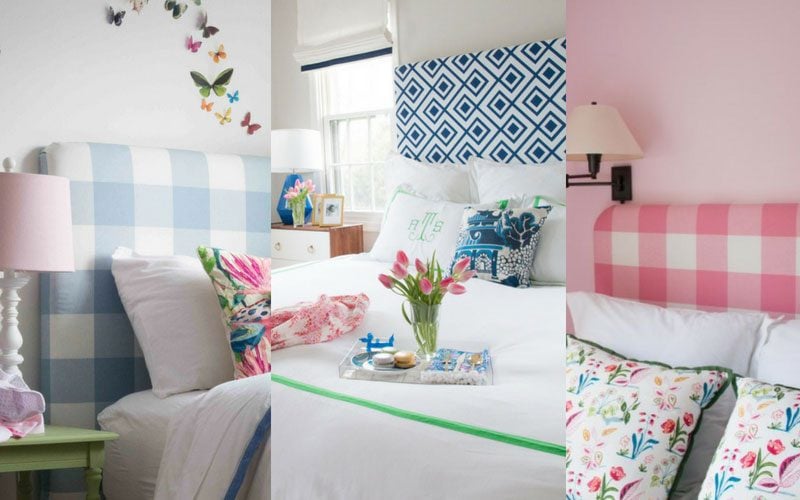
In the last four years, we’ve made four DIY Upholstered headboards: one for our master bedroom, one for my daughters’ shared bedroom, one for our nursery (which we recovered–so we did it twice!) Doing that many headboards will quickly teach you what works and what doesn’t when it comes to making your own fabric headboard! So here are all the dimensions, materials, and techniques you need to make your own!
TIPS & TRICKS FOR MAKING YOUR OWN HEADBOARD:
- You can use either a hot glue gun to adhere the foam to the plywood or you can use a heavy duty fabric adhesive
- Remember to use upholstery weight fabric–you want to pull the fabric pretty tight and anything not heavy enough will split! It has happened to me when we made our DIY Upholstered Rocking Chair
- Lay down a large drop cloth underneath where you will be working, it will catch any staples that you might miss and make clean-up easier!
- Set the headboard up either on a table (like we did for the full size and the twin size DIY headboards) or two saw horses (like we did for the king size DIY Headboard.)
- Make sure to apply enough pressure with your Staple gun to perforate the wood.
- Hammer out any staples that stick out!
CHEAT SHEET DIMENSIONS FOR DIY UPHOLSTERED HEADBOARD:
HOW BIG IS A HEADBOARD?
Below, I have outlined the traditional sizes for headboards. We have made all of these–including the extra tall king!
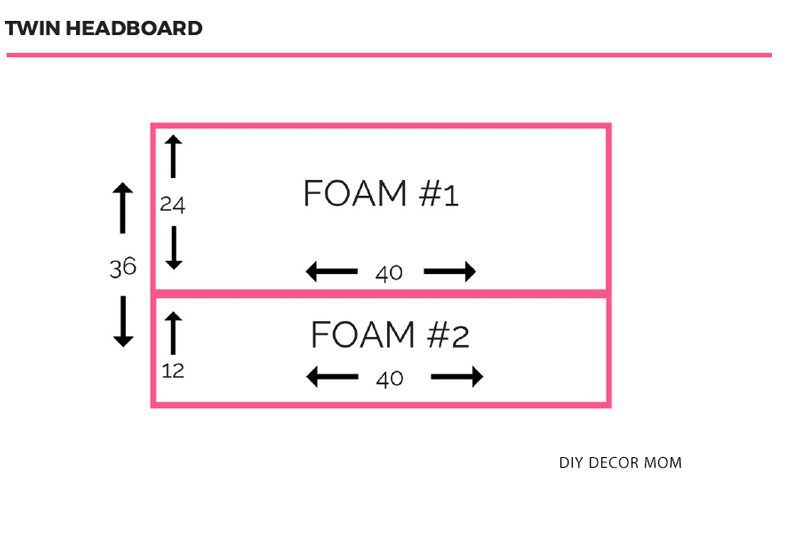
- Twin Headboard Size: 40″ x 36″
- Full Headboard Size: 54″x 36″
- Queen Headboard Size: 60″x 36″
- King Headboard Size: 76″x 36″
- King Extra Tall Headboard Size: 76″x 48″
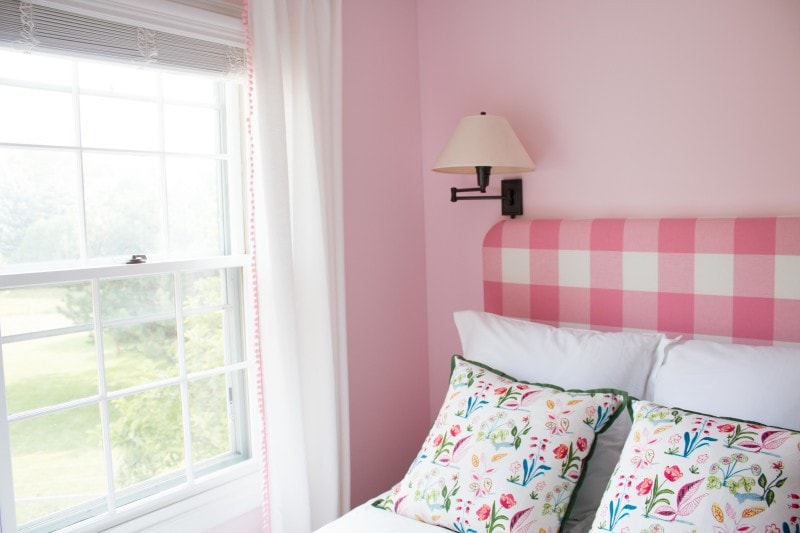
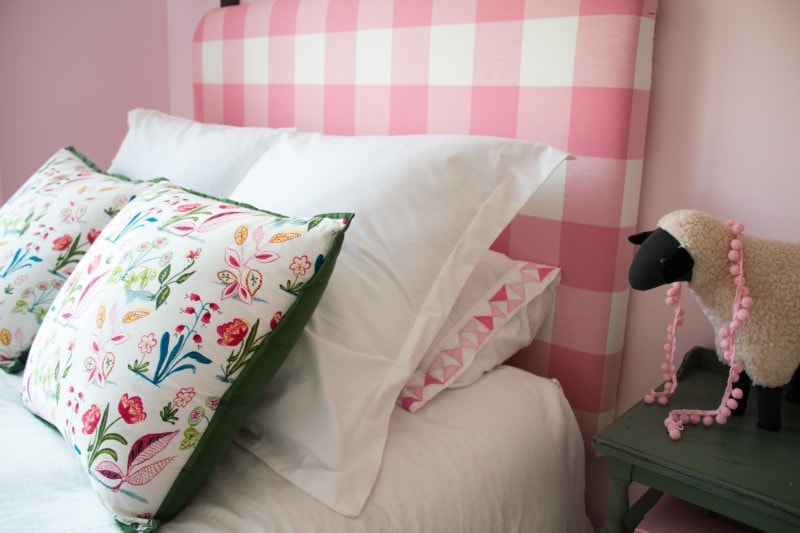
(full size DIY Upholstered Headboard that we covered in pink buffalo check fabric)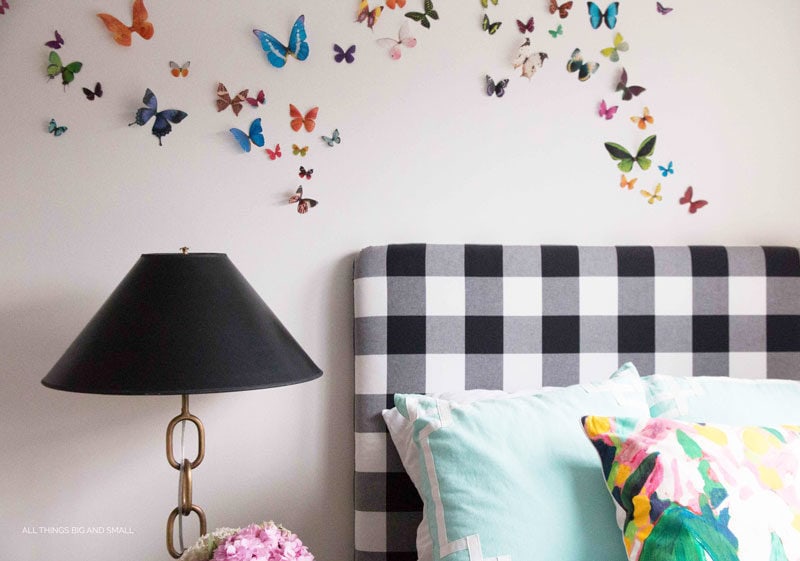

(The DIY fabric headboard in the nursery is a twin size.)
MAKING A FABRIC HEADBOARD
MATERIALS: To see specific amounts, measurements, and dimensions download the printable directions HERE.
*affiliate links are included at no additional cost to you. Read my full disclosure policy here.
- fabric –
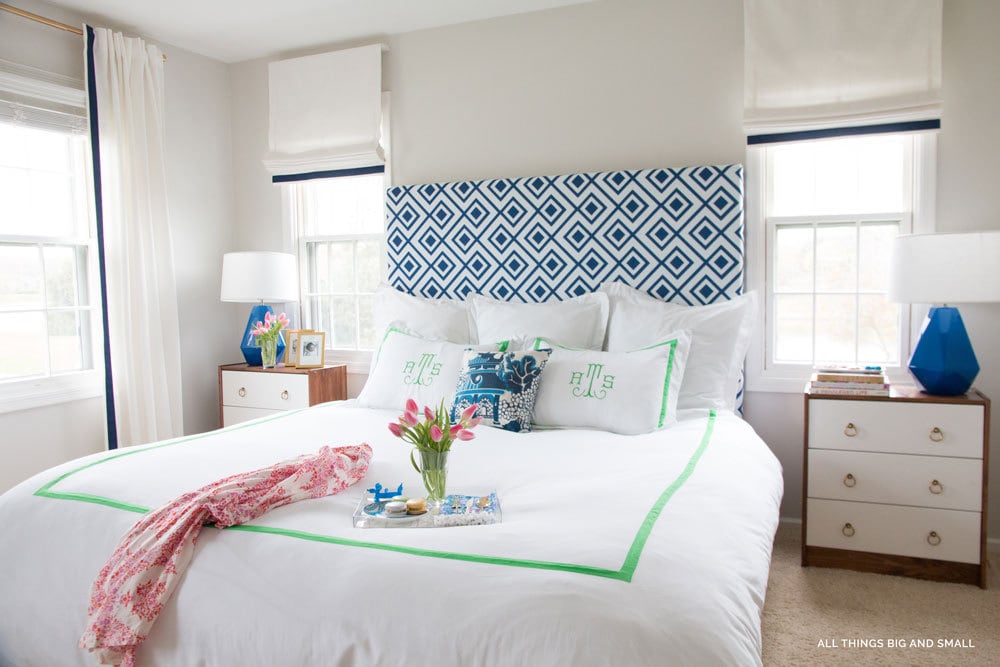
- pink buffalo check is from Calico Corners and black and white was discontinued but from Ikea, blue buffalo check is from Etsy, and blue and white geometric print is from Spoonflower (I shared amounts for each in the guides)
- TWIN: 2 yards
- FULL: 3 yards
- QUEEN: 3 yards
- KING: 4 yards
- pink buffalo check is from Calico Corners and black and white was discontinued but from Ikea, blue buffalo check is from Etsy, and blue and white geometric print is from Spoonflower (I shared amounts for each in the guides)
- staple gun *don’t skimp on it–the more expensive ones will give you more versatility
- batting 4 oz. weight or you can go to your local fabric store\
- TWIN: 2 yards
- FULL: 3 yards
- QUEEN: 3.5 yards
- KING: 3.5 yards
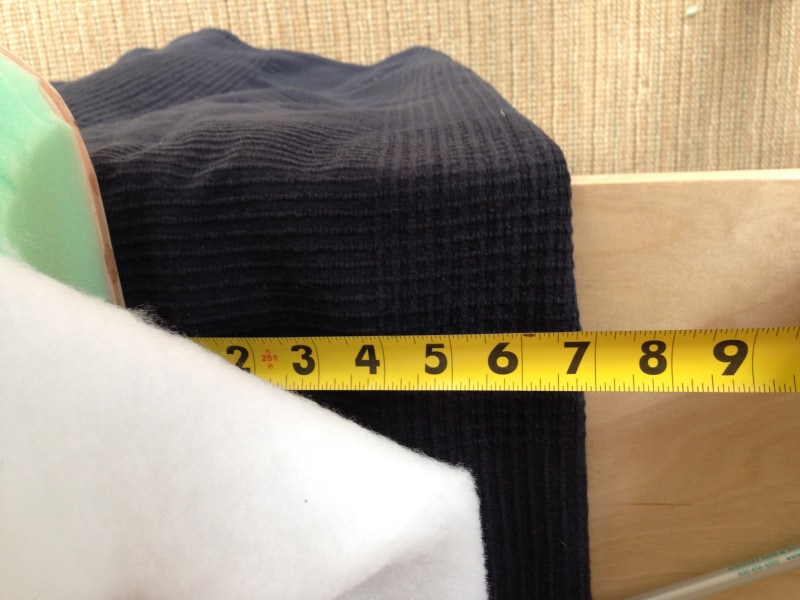
- 2″ foam or you can go to your local fabric store:
- TWIN: 2 yards
- FULL: 3 yards
- QUEEN: 3 yards
- KING: 3.5 yards
- plywood backing:
- TWIN: 36″x 40″
- FULL: 54″x 36″
- QUEEN: 60″x 36″
- KING: 36 “x 76″ or extra tall 48″x 76”
- a sharp knife (chef’s or serrated is fine but an electric carving knife is best)
- hot glue gun any one will do but the larger ones are worth the money!
- sharp scissors or fabric shears I use 8″ gingher shears
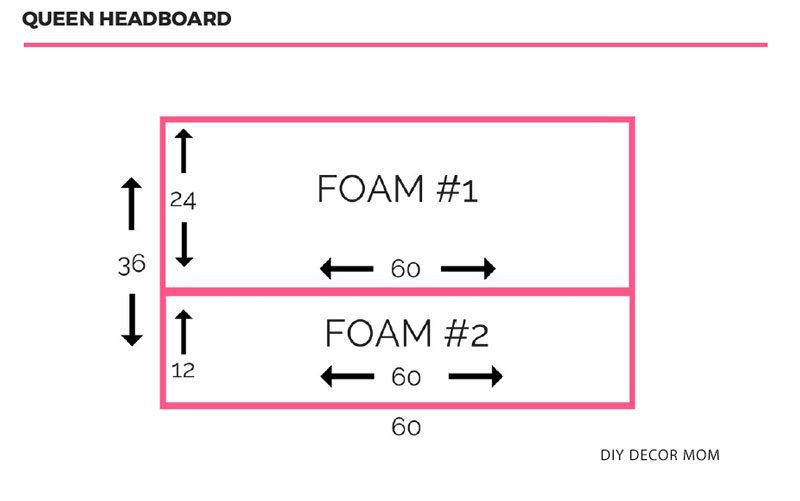
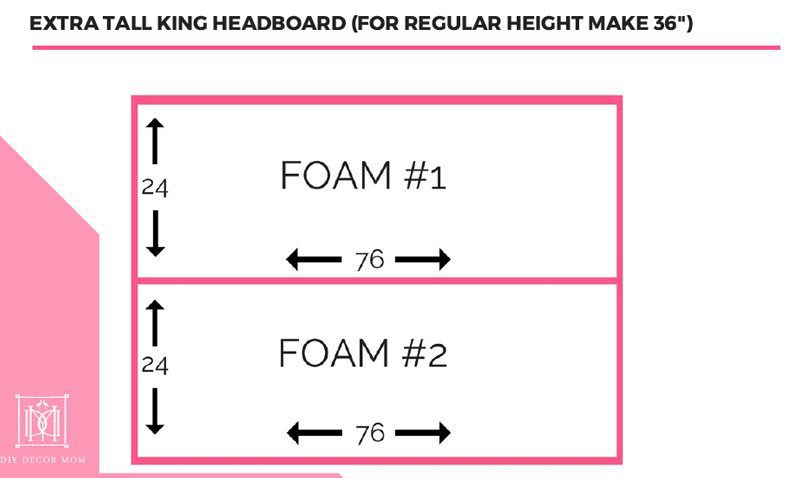
FABRIC HEADBOARD DIMENSIONS: HOW TO ADD PADDING
Use these diagrams to add the foam backing to the plywood. You can see the cut list in the diagram for each size fabric headboard.
- TWIN HEADBOARD:
- FULL HEADBOARD:
<

- QUEEN FABRIC HEADBOARD:
- KING HEADBOARD: for Extra Tall use the following dimensions, for normal height king size headboard use 36″ height
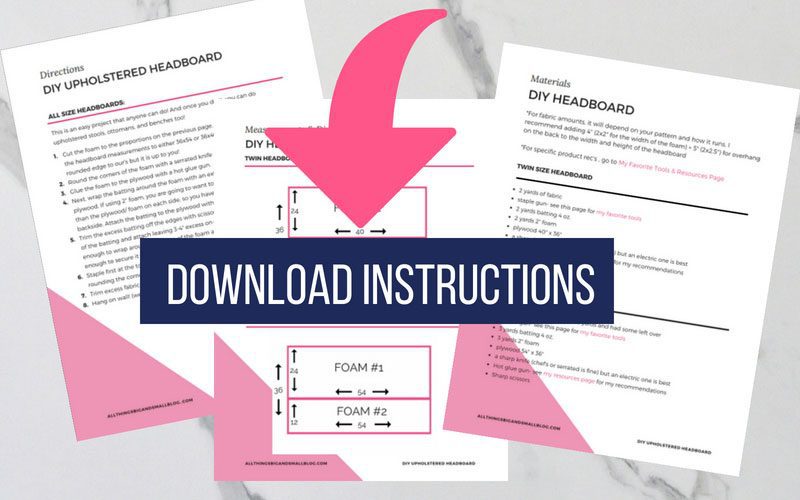
DIRECTIONS: Print out these instructions so you have the cut lists and all the measurements and don’t have to pull up your phone or computer a million times!
1.) Download my exact measurements with diagrams for cutting the foam here with printable dimensions for both twin and full/ double sizes! *It also now includes measurements for queen and king sizes as well!
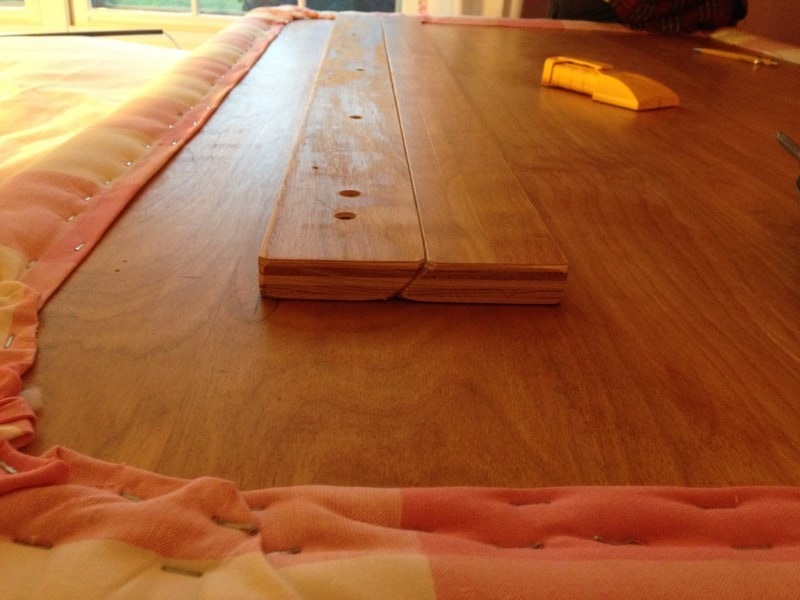
2.) Cut the foam to the proper proportions. Have Home Depot cut the headboard measurements to either 36″x54″ or 36″x40″ (full or twin size.) We added a nice rounded edge to our headboards but it is up to you! For our king size DIY Headboard, we kept the edges sharp.
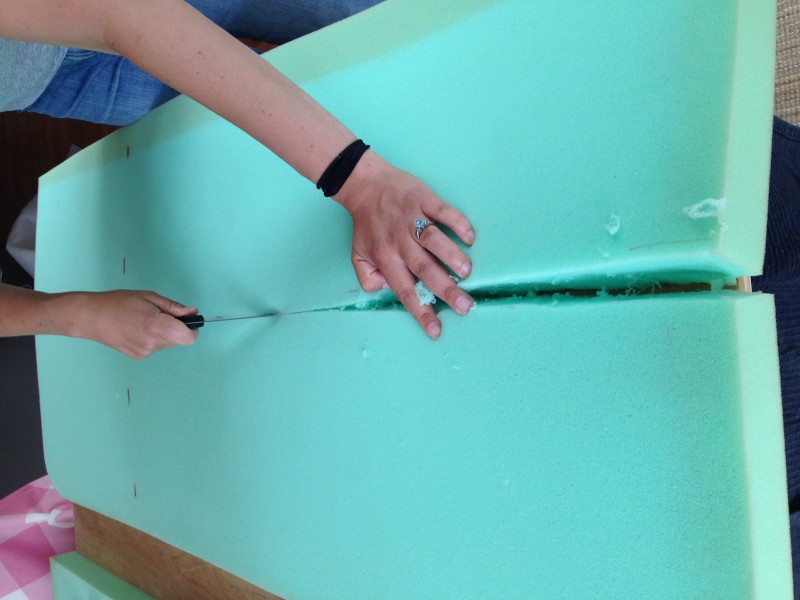
3.) Round the corners of the form with an electric carving knife.
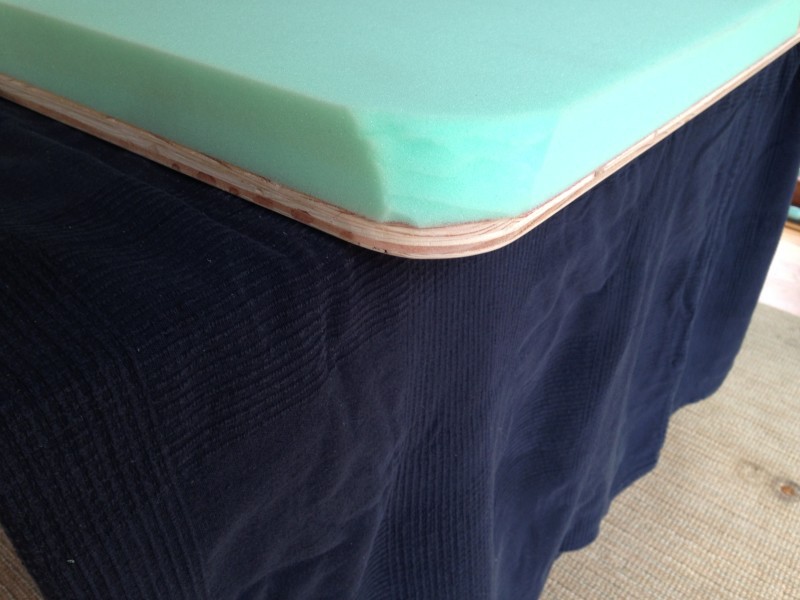
4.) Glue the foam to the plywood with a hot glue gun.
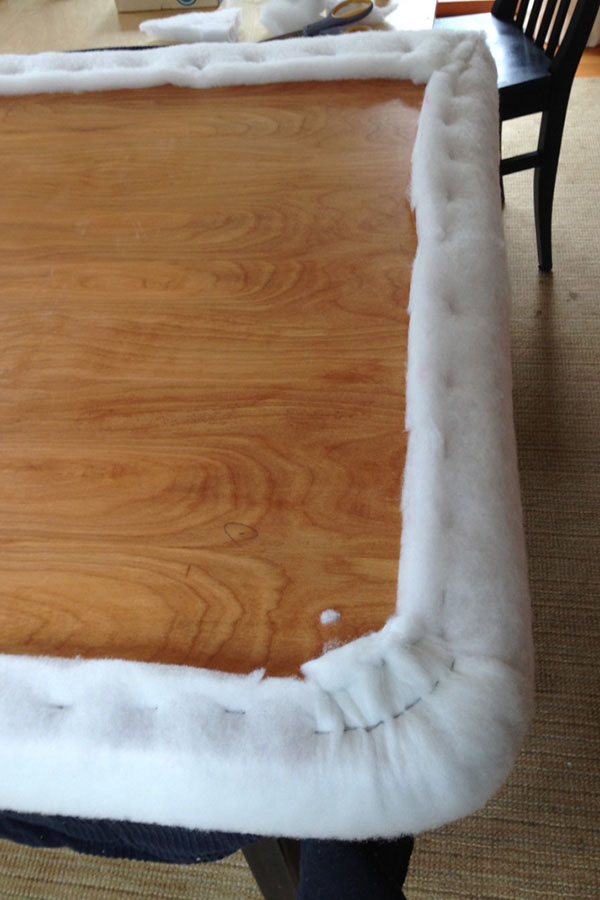
5.) Next, wrap the batting around the foam with an extra 3.5″-4″ on the back of the plywood. You want extra batting so you can make it around the foam and still have plenty to secure to the plywood. If using 2″ foam, you are going to want to have the batting 5.5″ or longer than the plywood on both sides, so you will have about 3.5″ excess on the backside. Attach the batting to the plywood with a staple gun.
6.) Trim the excess batting off the edges with shears. Next, place the fabric on top of the batting and attach leaving 3-4″ excess on each side to ensure you have enough to wrap around the edge of the foam.
7.) Staple first at the top and bottom and then do the sides. Finally, staple the edges rounding the corners as you go.

8.) Trim the excess fabric from the edges.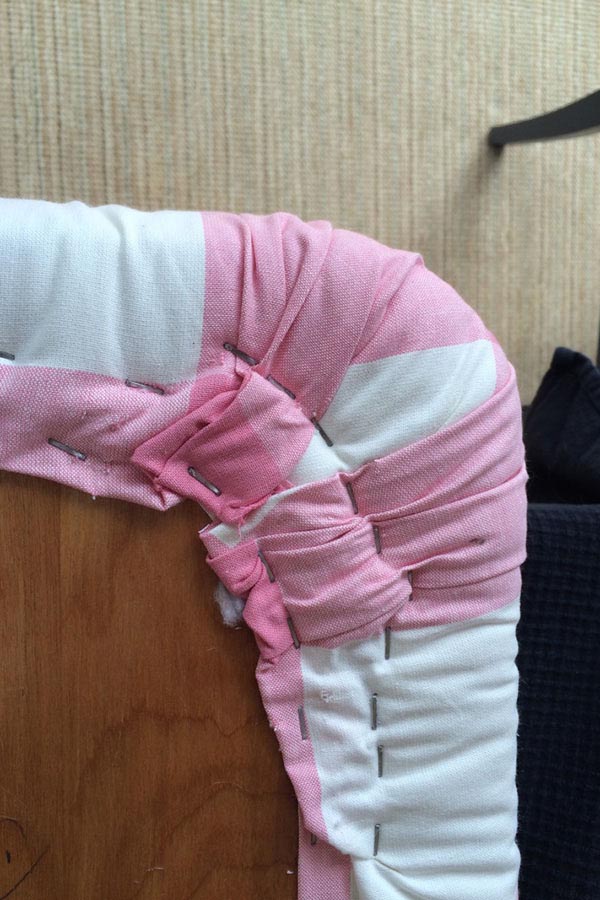
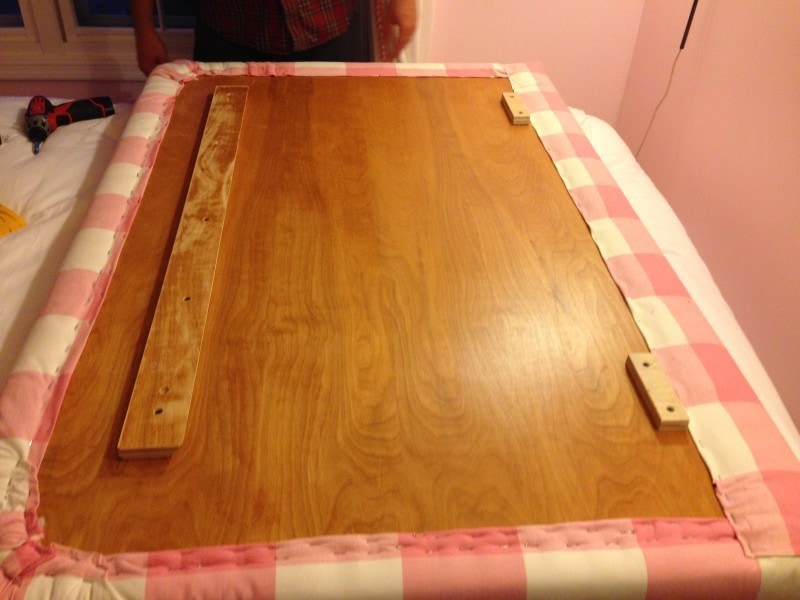
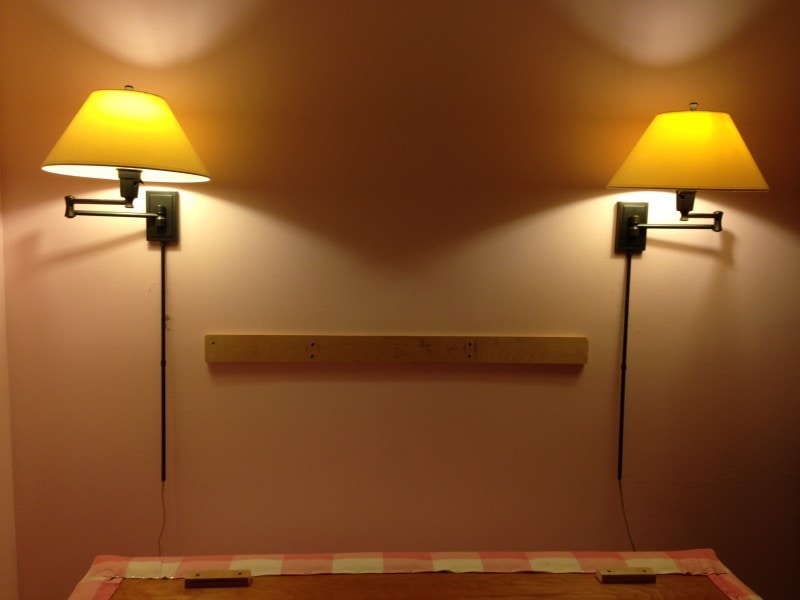
9.) Mount the headboard on the wall (we used a french cleat.) It has held up really well over the last year and I never worry about it falling down on the kids!

VOILA! You have a fabric headboard that costs a fortune of what a custom one would cost. Each of these cost me anywhere from $100-200 to make and the cost of a custom DIY Upholstered Headboard ranges from $600-$1000!
FAQS ON FABRIC HEADBOARDS
HOW MUCH IS MAKING A FABRIC HEADBOARD GOING TO COST?
On average, these upholstered headboards cost about $100- $200 depending on the size and how much fabric and foam cushion you want. I always use 2″ foam, which can get expensive. If you wanted a less plush fabric headboard, you could certainly use 1″ thick foam instead. Add a piece of plywood onto that which is about $40 (now, you will be able to use part of it for something else too!) Plus, you are going to need 1.5-3.5 yards of fabric depending on the size of the DIY Headboard you want to make–all of that adds up. Sometimes DIYing is not less expensive than buying one–I picked 24 of my favorite headboards under $200 here if you want!
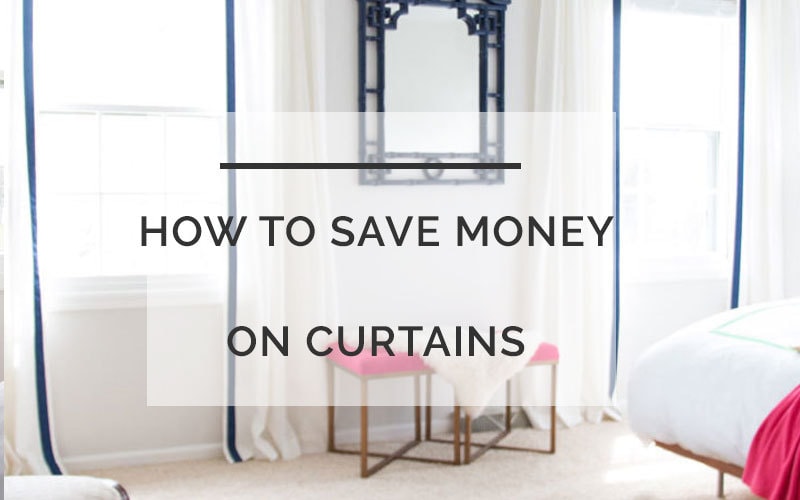
HOW TO SAVE MONEY ON DIY UPHOLSTERED HEADBOARD:
- SAVE MONEY ON PLYWOOD: We always use 3/4″ plywood which isn’t cheap; but, it retains its shape well, especially for larger expanses. You could however, get away with using 1/2″ plywood or some inexpensive MDF board.
- SAVE MONEY ON FOAM: To save money on the foam, make sure you print a coupon for 40% off before you go. Even if you need them to make multiple cuts of foam, make sure they ring it up at the fabric counter as one cut–otherwise, you won’t be able to use the coupon for both! Insisting they do this saved me $30 because the foam cushioning retailed for $39.99/ yard!
- SAVE MONEY ON FABRIC: Inexpensive sources of fabric are always a good idea!
- If you want a single color, you could always use velvet curtains from Ikea which are pretty inexpensive.
- Spoonflower is another good source for fabric; but, keep in mind that upholstery weight fabric runs about $27/ yd. Most of their inexpensive fabrics run more in the $17 range; but, those aren’t strong enough for upholstery. I picked up the buffalo checks one from Ikea (since discontinued) and one from Calico Corners.
- Other online retailers like Fabric.com are a fantastic source for affordable fabric as well!
- And you can always look at JoAnn Fabrics (I prefer their online selection), Michael’s, and Hobby Lobby as well!
Remember, you can download all the printable instructions with diagrams here–so much easier for making your own fabric headboard than trying to copy it off the computer!
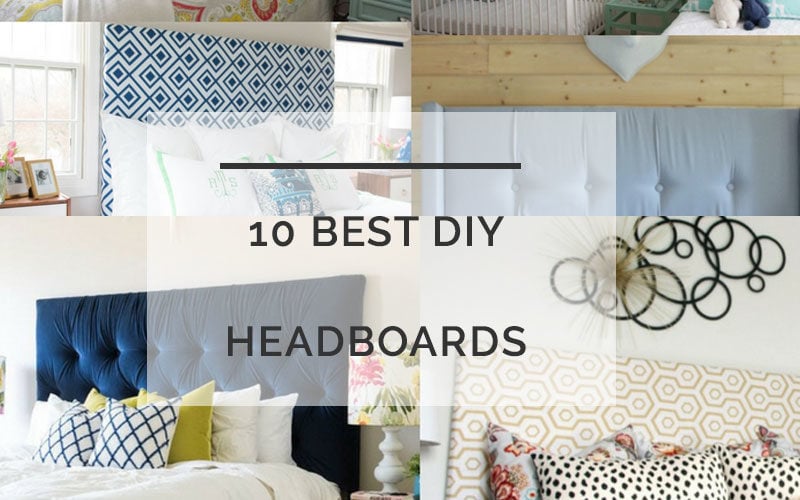
IF YOU LIKED THIS, YOU’LL LOVE
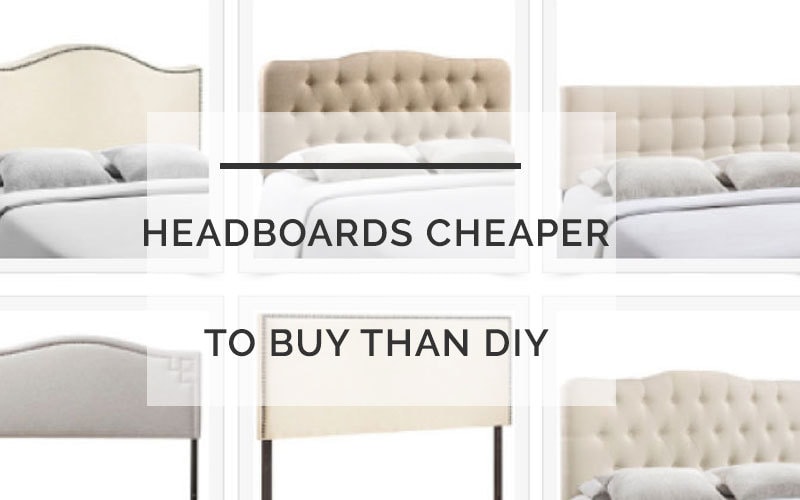
24 Affordable Headboards that are Cheaper to Buy than DIY

Awesome tutorial! I’ve always wanted to try and make one myself, and LOVING that pattern <3
Green Fashionista
Aww thank you Kate! You are too sweet! The buffalo check is so fun and neutral!
xo
Annie
Amanda,
Thank you so much! You are so sweet! Hope you and the kids had a great weekend!
xo
Annie
This post couldn’t have come at a better time – I would love to (eventually) revamp our guest room, but I don’t want to spend more money on a headboard/bed frame when we already have one that’s perfectly fine. BUT, if I can DIY something like this, then that’s a huge money saver! Thanks so much for sharing!
Karly,
I am so glad it helped! It was such a straight-forward DIY and really beats the alternative of buying a pre-made headboard for a lot more money! Can’t wait to see your guest room!
xo
Annie
Love the fabric choices. Great step by step tutorial!
This is a beautiful headboard! Thanks for the detailed instructions.
What a wonderful job! I love the buffalo check fabric. Where did you purchase it? I am in love with it!
Tammy, I got the pink buffalo check from Calico Corners and the black and white from Ikea! xo Annie
It looks beautiful! Love the checkered pink material you used! Thanks for sharing at our link party!
This is so adorable! Love the pink and the black.
I have the black and cream buffalo check made into curtains. Mixes with everything.
Thanks so much for sharing at Thoughts of Home on Thursday. :)s
I really want to do this for my daughter’s Bedroom! Thanks for the inspiration! You’re a feature this week at Welcome Home Wednesdays! Congrats! See you tomorrow.
What a great tutorial! I love the headboard and the pillows on the bed, they are adorable!!
– Jaclyn
Where did you get the fabric for the 2 smaller pillows? Love it!!
Unfortunately, they are no longer available. I got them at Waiting On Martha – http://rstyle.me/n/cse5eub8fj7
Do you have a rule of thumb as to how far below the mattress the headboard should go? Does the boxspring slide under the mattress towards the wall at all? Thanks! By the way – it is a beautiful headboard!
Thank you Marina! I usually do 4″ because I figure the mattress will slump down a bit when I get in! Thank you so much for the lovely compliment!
Annie
Thanks for the great tutorial! About how long is the French cleat on the king bed? I noticed that the twin one does not go all the way to the sides. We have a family bed and I’d love to make some headboards like this to go along the side wall and top of the king and twin… but will probably make three separate headboards! 🙂 Thank you!!