*This is a sponsored post by JOANN Stores. All thoughts and opinions are mine alone.
Halloween Table Decor: Looking for an easy Halloween tablescape for your Halloween party? These easy Halloween table decor ideas are easy to DIY and will make your home festive and spooky for your Halloween celebrations!
HALLOWEEN TABLE DECOR
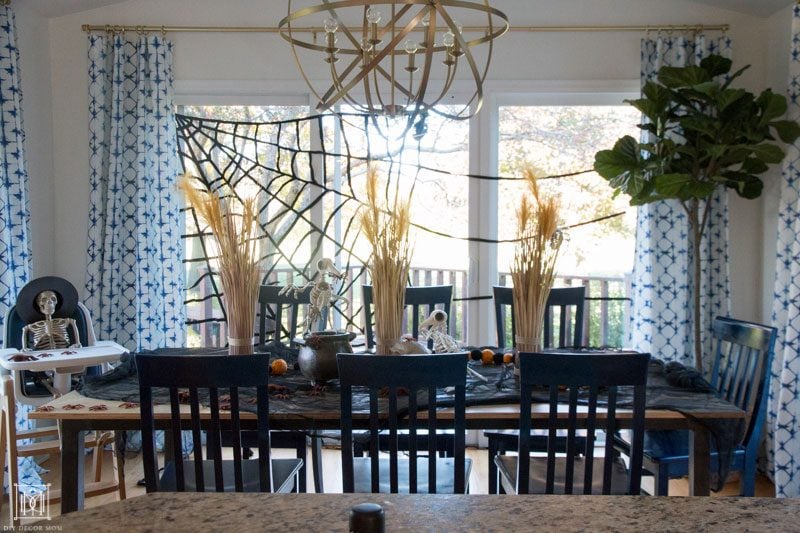
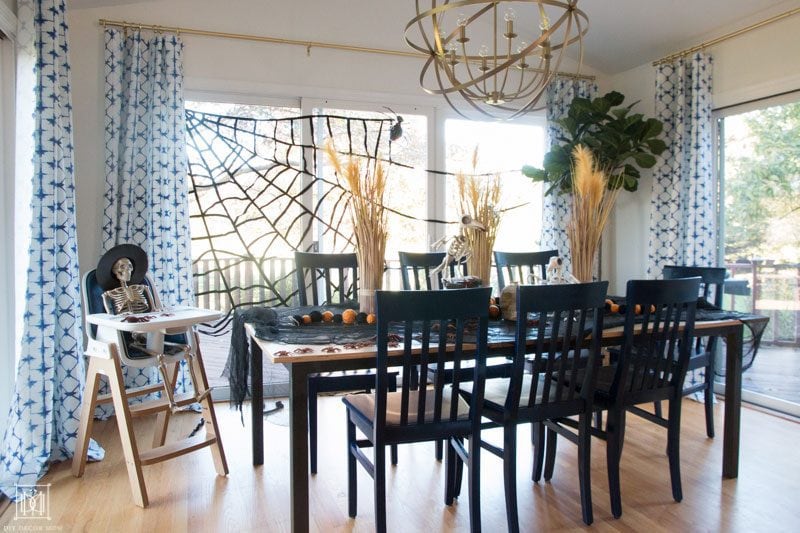
To be completely transparent, this is the first year I’ve really gone all out for Halloween. In year’s past, I’ve worried it’d be too scary for the kids and I didn’t really know where to start. I was intimidated by the thought of DIYing a complex Halloween tablescape, so I didn’t do it at all. But, now that I know how easy it is (and I’ll show you exactly how to create your own) I’m hooked! The kids came home from school and exclaimed how much they loved the “spooky but not too scary” Halloween decorations in our breakfast area.
HALLOWEEN TABLESCAPE DIRECTIONS
HALLOWEEN DECOR MATERIALS:
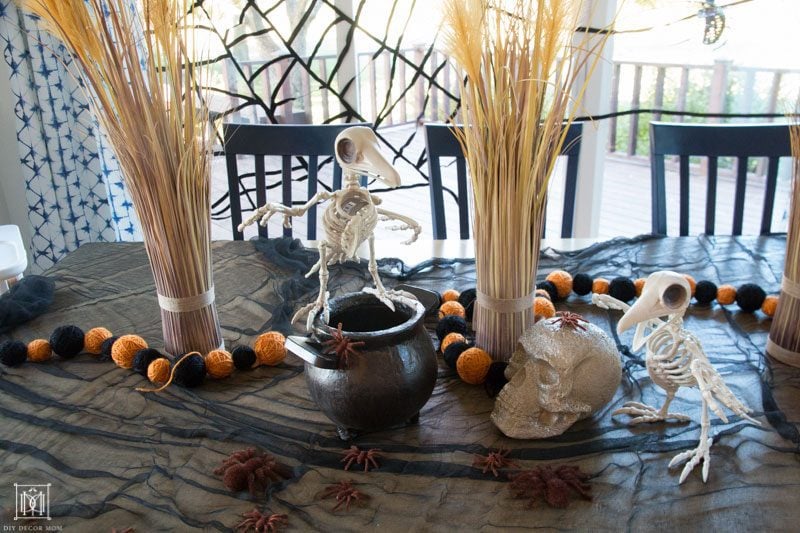
- 36″ Poseable Skeleton Bones
- (3) packs of spiders
- Maker’s Halloweeen 248″x24″ Creepy Fabric- Black
- (3) Blooming Autumn 32″ Cattail Arrangement
- one witch’s cauldron- https://www.joann.com/paper-mache-cauldron/16087132.html
- one styrofoam skull
- Krylon spraypaint in gold and oil rubbed bronze
- one paper mache witch hat
- (2) Boneyard Raven Bones
- (2) Maker’s Halloween 60″ Ball Garland- Orange and Black
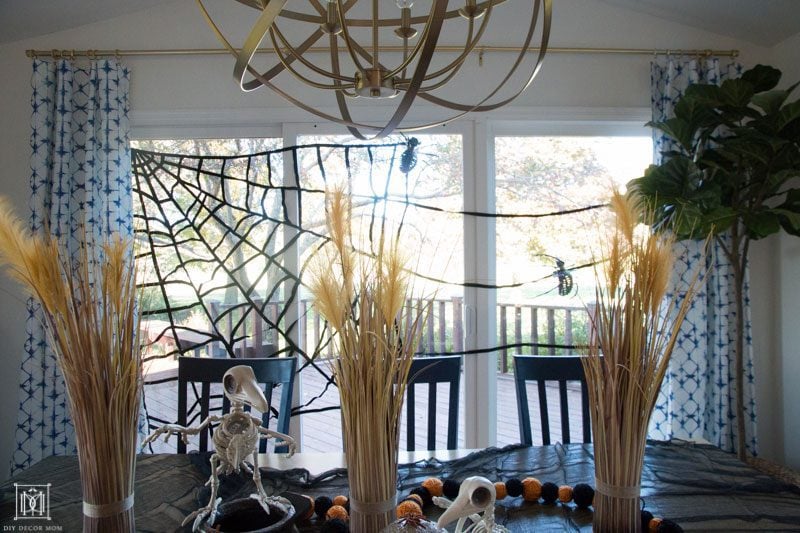
- Maker’s Halloween Large Corner Spider Web
- (2) Maker’s Halloween Oil Slick Spider Bones
- tape for hanging the giant web
DIRECTIONS FOR MAKING HALLOWEEN TABLESCAPE:
1.) First, start off by sourcing your materials. My favorite way to get ideas is to go to JOANN and peruse their seasonal decor aisles. They have so many great products that it’s easy to get inspiration. Remember to always look for three main elements at the store for any tablescape: a tablecloth or background, centerpieces (with some height), and a couple of decorative objects.

2.) When you are back home, lay out all your inspiration. You want to start with a blank slate, so clear your table. Then, take out all your materials. I like to put them on the floor nearby so I can see everything.
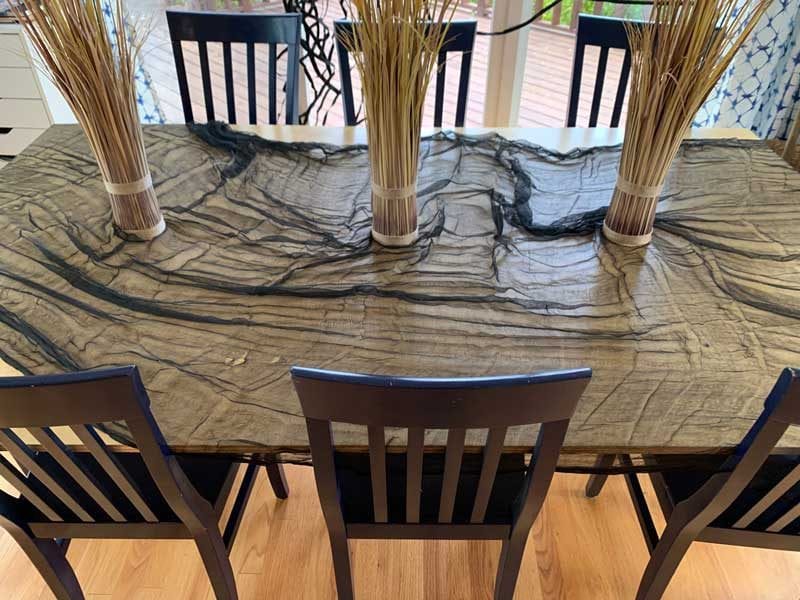
3.) Lay out your tablecloth. I chose to use this creepy black fabric which I casually draped over the table, ruching it in some sections, and letting it drop to the floor in others.
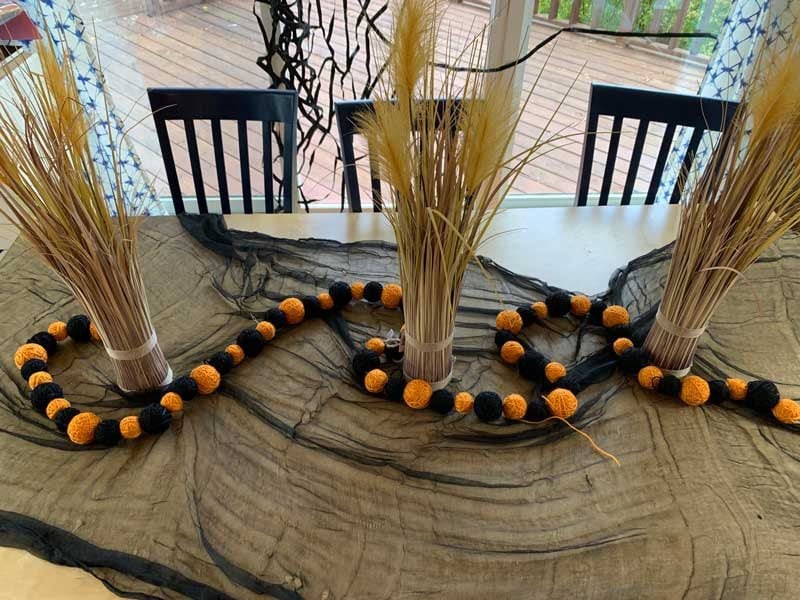
4.) Add centerpieces: For this Halloween table decor, I used the three Blooming Autumn 32″ Cattail Arrangement which is an amazing value (and can be reused for your Thanksgiving tablescape!)
Decorator’s tip: Always work objects in groups of odd numbers like 1, 3, and 5!
5.) Create movement: I some visual movement to the tablescape by looping two Halloween yarn garlands around the three centerpieces. This added a nice layer of texture, color, and movement all in one!
6.) Then, you want to add some height and spooky props! I added the two Boneyard Raven Bones and then perched one on top of the witch’s cauldron I previously spraypainted using Krylon spraypaint (find Krylon spraypaint at JOANN here.) I also added the spraypainted skull.
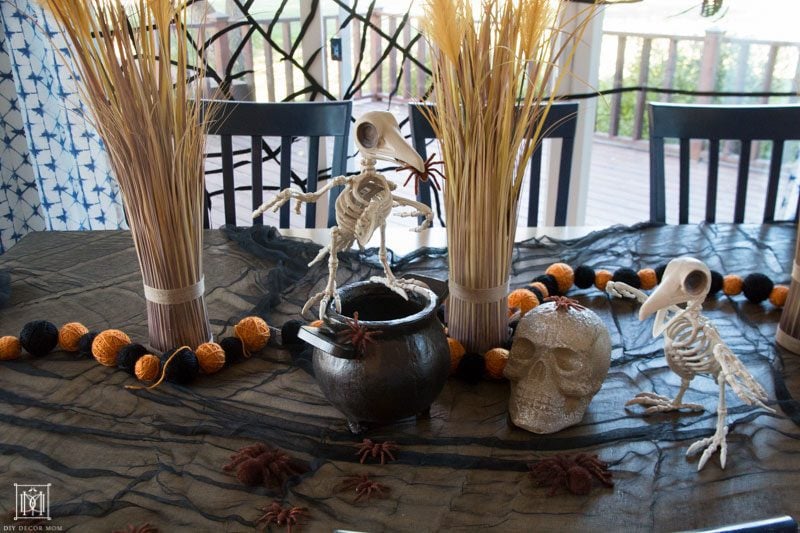
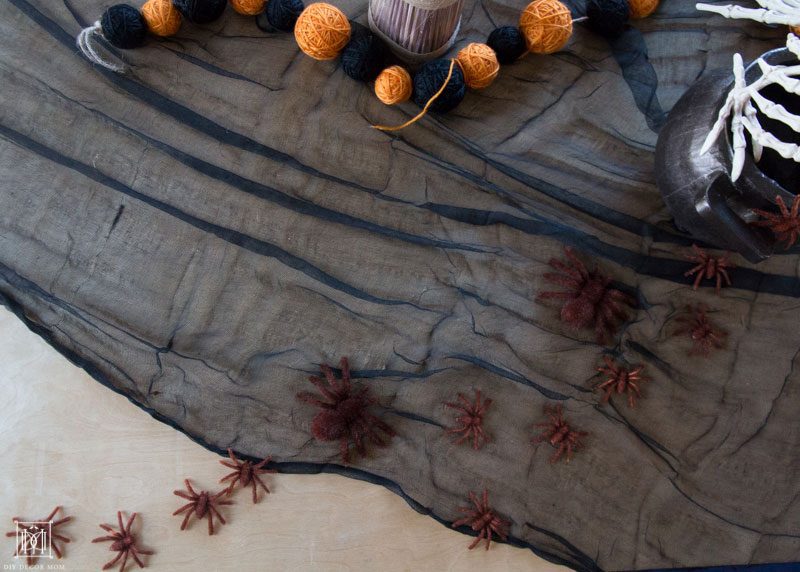
7.) Add something unexpected: To finish, I added the spooky trail of spiders to add some more movement to the table. By lining them up in a line, it made it look like they were alive marching into the cauldron. I even added one to the skeleton bird’s mouth to be extra gross!
OTHER HALLOWEEN DECOR IDEAS
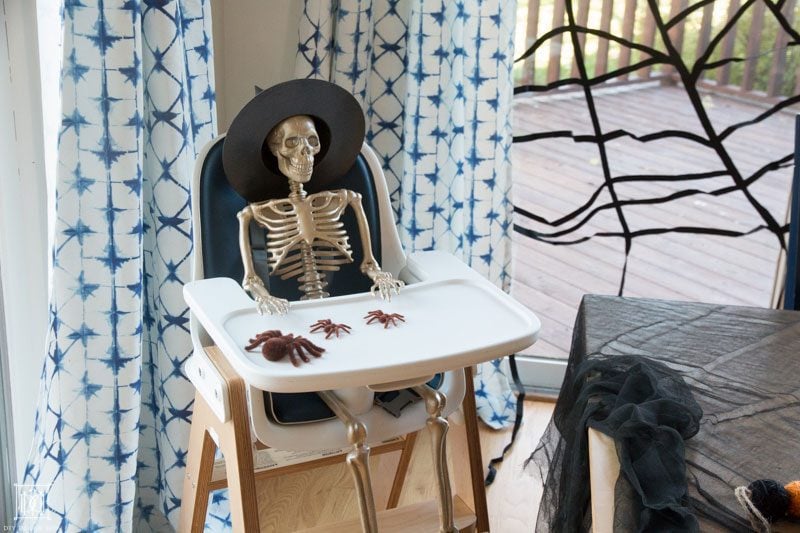
For some added fun, I added two other Halloween props to the breakfast room: a spraypainted skeleton in a high chair wearing a witch’s hat and a giant spider web on our back sliding doors with two spiders suspended from the curtain rod using sewing thread.
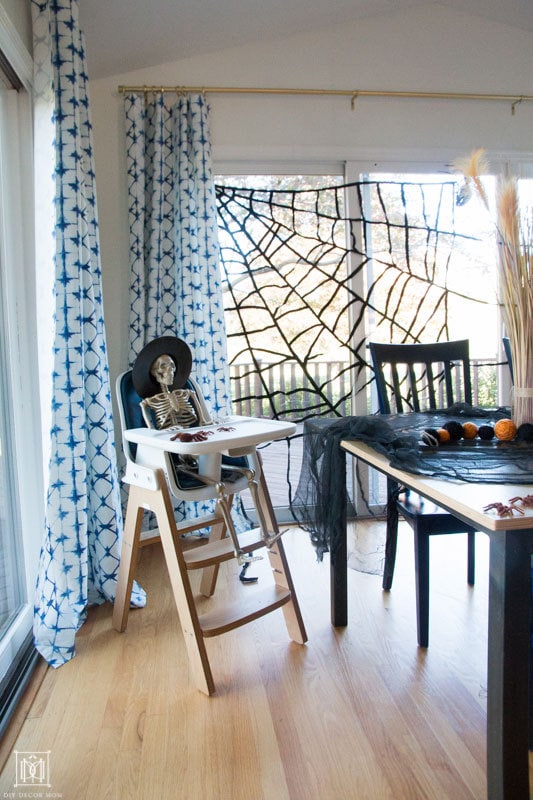
 To suspend the spiders, I merely tied a knot around the spider’s head with some basic sewing thread you can pick up at JOANN. Then, I tied it around the top of the curtain rod in a knot. By alternating the height at which I hung them, I made it look more natural.