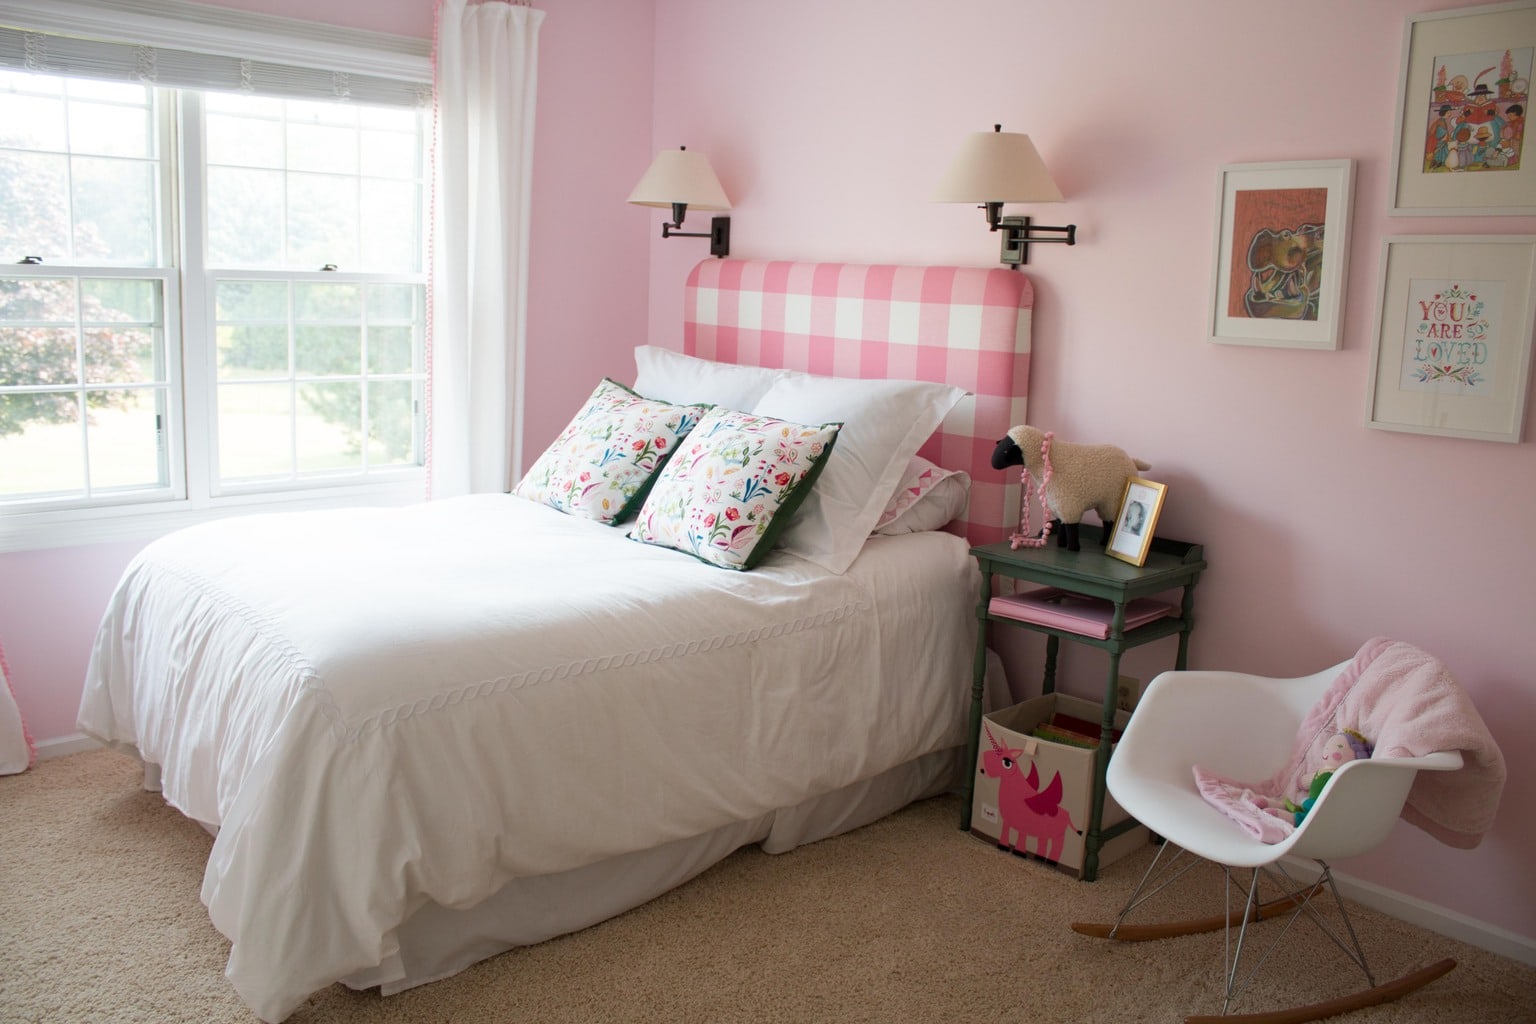
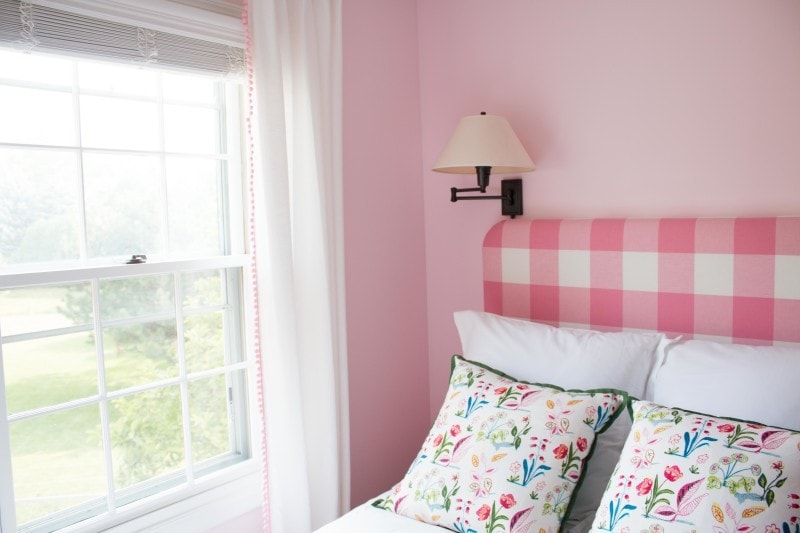
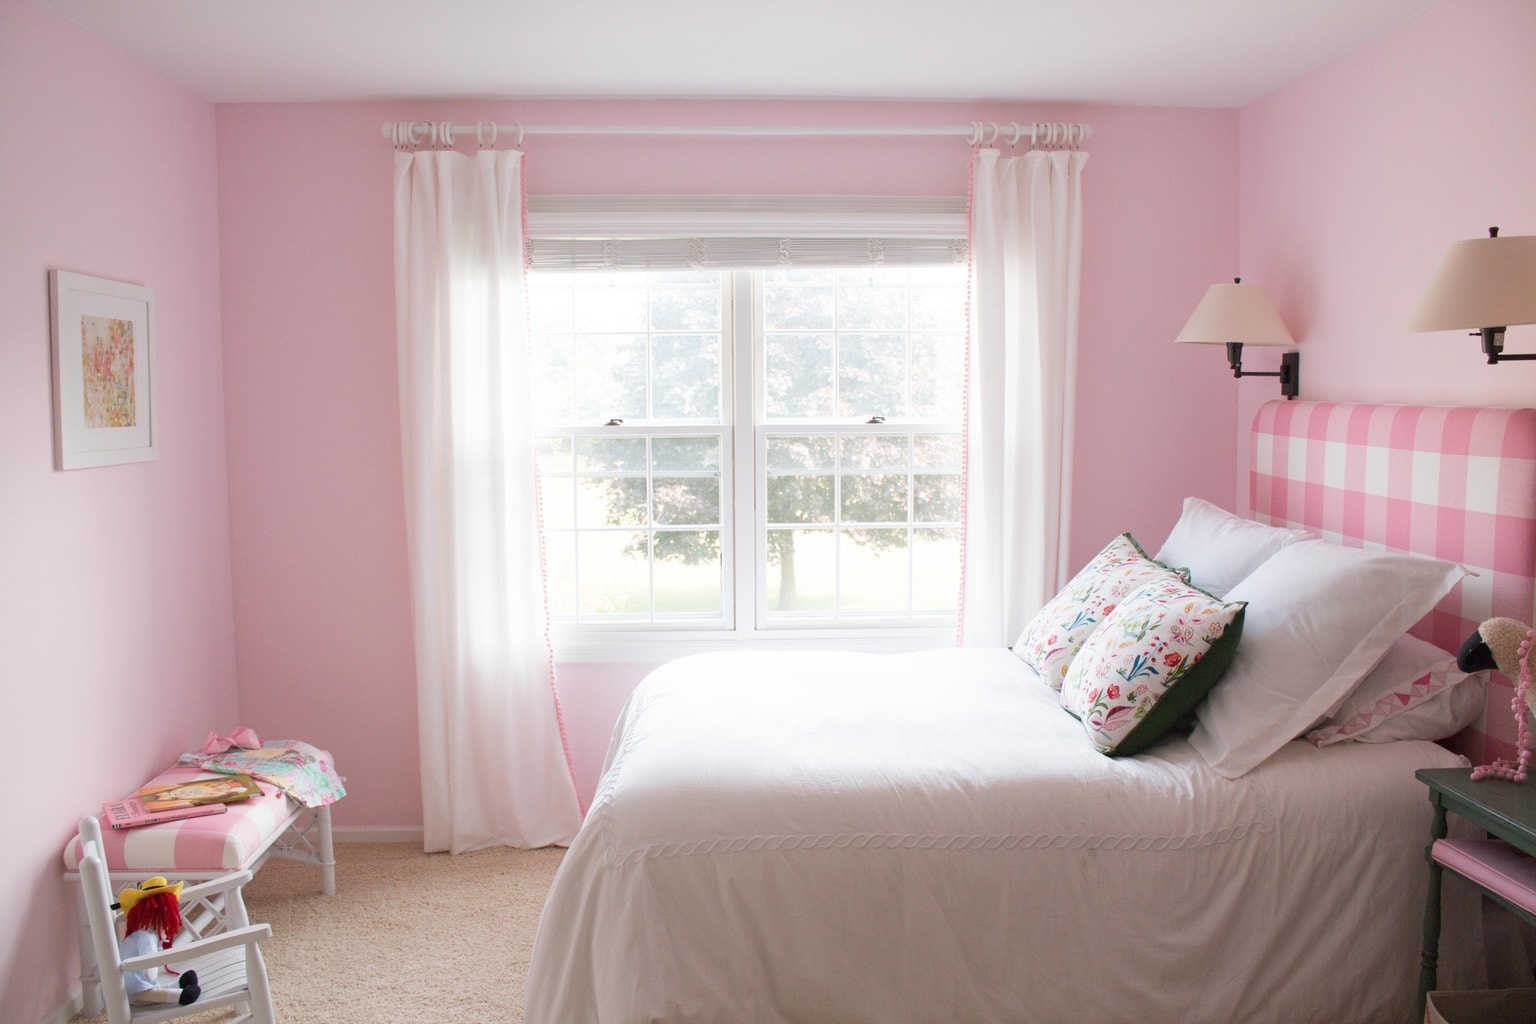
As you may have seen from yesterday’s post, there have been some recent updates to B’s room. I have always wanted to make a DIY upholstered headboard and I have had the itch to make a pink buffalo check ever seeing Nick Olsen’s pink buffalo check room in Domino back in the day? Remember it? I covered it in a post about a year ago here, Get the Look: Nick Olsen’s Domino Bedroom.
Image Nick Olsen for Domino Magazine
I have to say, I am really happy with how this DIY upholstered headboard turned out. It really pulls the room together while giving the bed much more presence and height. All told it came in at about $150 which was more than I had initially thought it would be, but WAY less than a custom headboard would be if I had purchased it.
Related: See 24 affordable headboards here if you want to spend under $200.
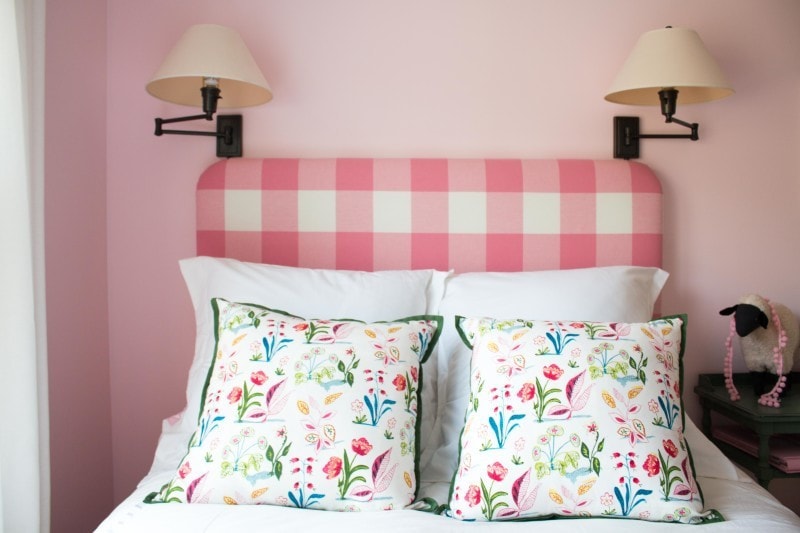
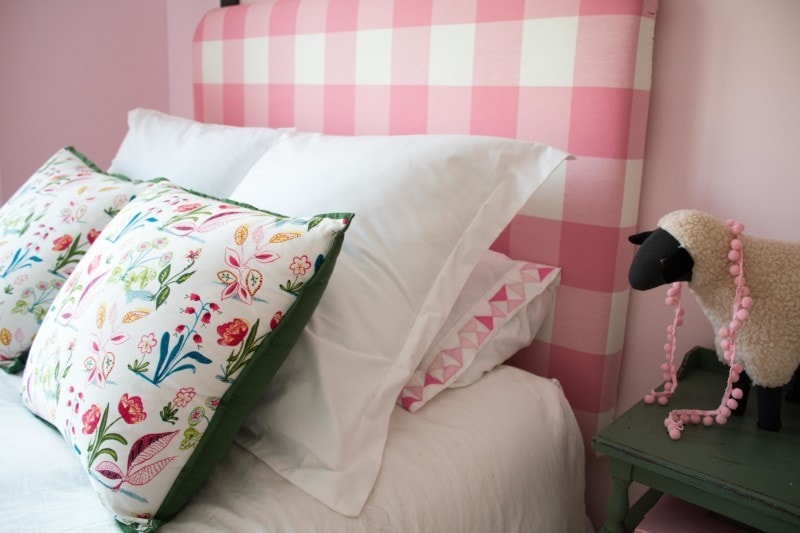 floral pillowcases from Waiting on Martha (no longer available)/ pink sail pillowcases Serena and Lily (no longer available)
We just rehung the sconces that were above her bed before (the same ones we used in our old house in the master bedroom.) They aren’t perfect, and I would love if they were brass but they were FREE!
 See my post on her DIY Pom-Pom Curtains here!
HOW TO MAKE A DIY UPHOLSTERED HEADBOARD
So here is how we made our DIY upholstered headboard! Again, I had help from my amazing mother-in-law who teaches me so much every single project! If you would like to download complete FREE PRINTABLE DIRECTIONS.
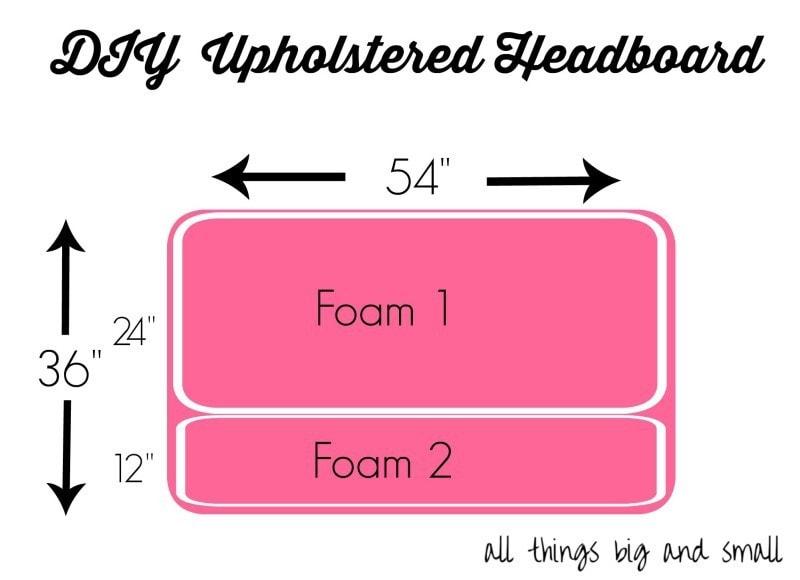 As far as materials we used the following: 3.5 yards (you could probably get away with 2.5) of fabric. I used this Strawberry Buffalo Check fabric from Calico Corners which I picked up when it was on sale for $18/ yd, a staple gun, thick batting (I think we used the 4 oz.) from JoAnn with a 50% off coupon, and 3 yards of 2″ foam from JoAnn (50% thankfully because it rang in at $110 without a coupon!)
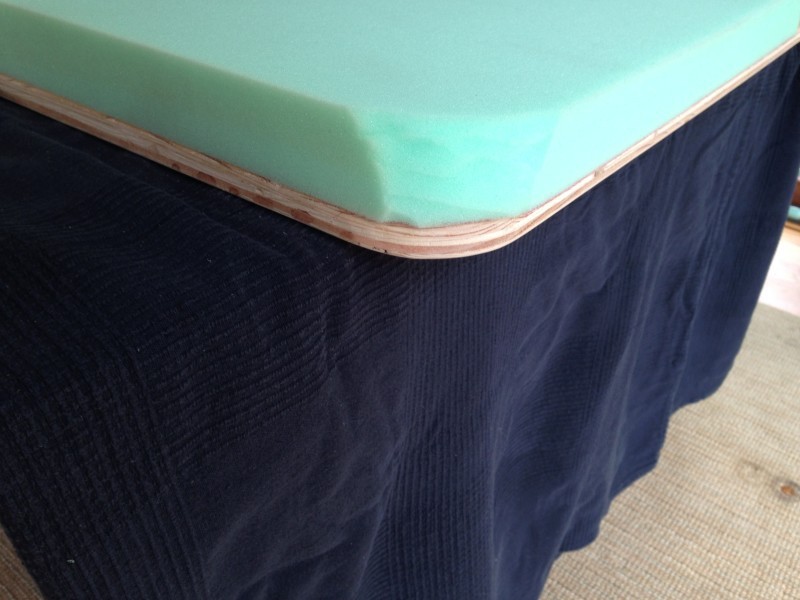
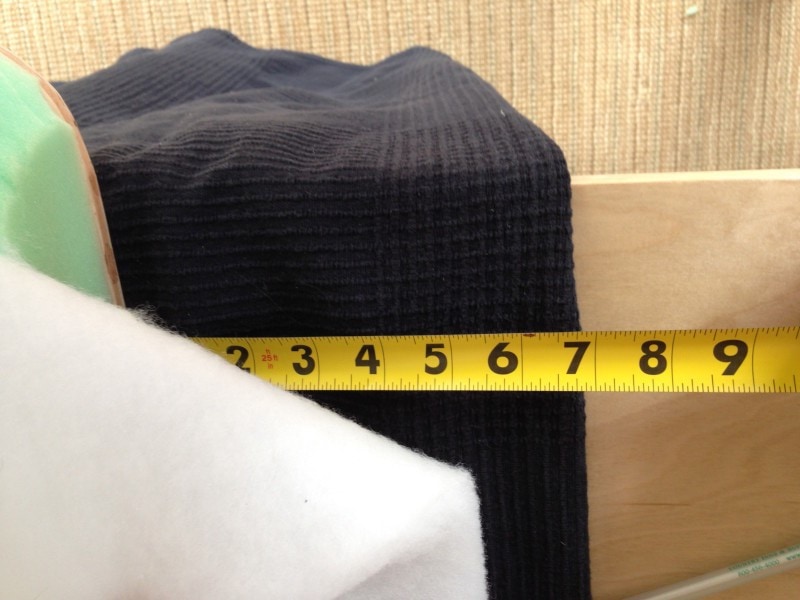
We did try to use two twin size mattress cushions (the egg shell crates) and they were horrible so we returned it. We used some birch plywood we already had on hand, but you might have to pick that up if you don’t have it, and Evan luckily rounded the corners for me in his workshop. Since JoAnn Fabrics only carries 2″ foam in 24″ wide sheets by 2.5 yds, I had to ask the sales associate to cut up two 54″ sections. Then, at home, I cut one of the 54″ sections half-way lengthwise (see the picture below for the measurements.) It isn’t to scale but it conveys the idea. These measurements are for a full-size bed.
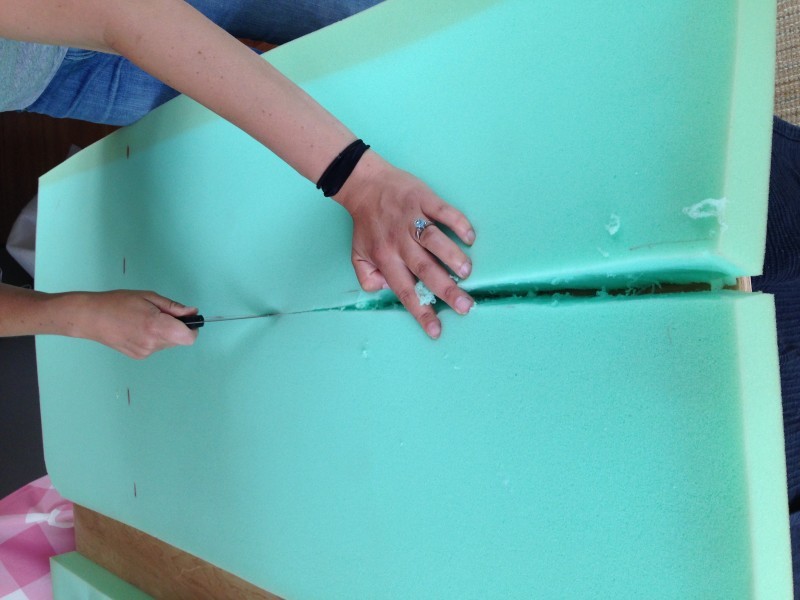
Next we rounded the top edges with a serrated bread knife (the same one I used above). If you have an electric knife it is much easier and you will get a much cleaner cut.
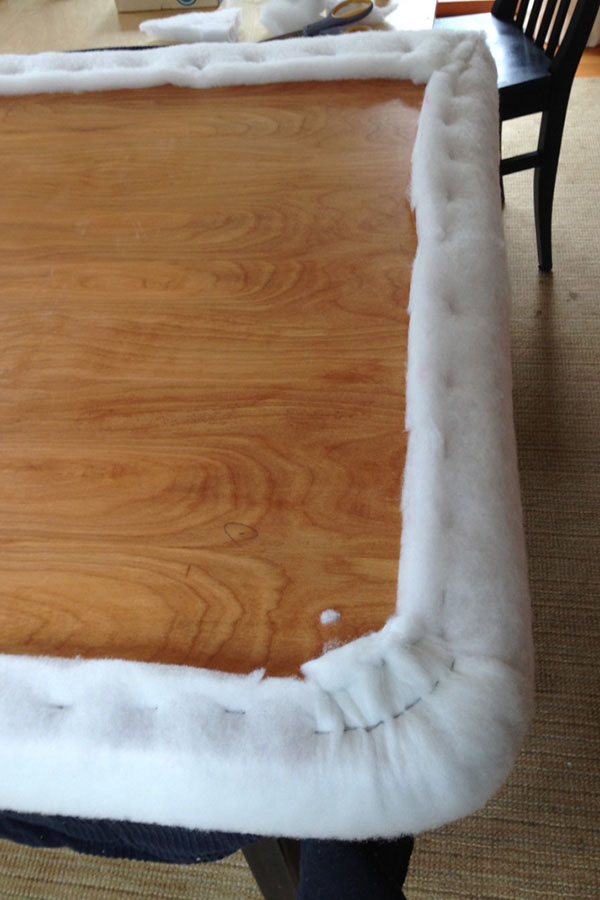
We placed the two factory cut seams next to each other in the middle and my hand-cut seam on the bottom which would hide behind the mattress anyway so no one would see it. We glued the two pieces of foam together with a glue gun and then the foam pieces to the plywood as well. Next, it is time to wrap the batting around it. We left about 5.5 inches of batting on each edge to ensure that we had plenty to wrap around the foam (2″) and then about 3-4″ on the back of the plywood so there would be sufficient room for stapling.
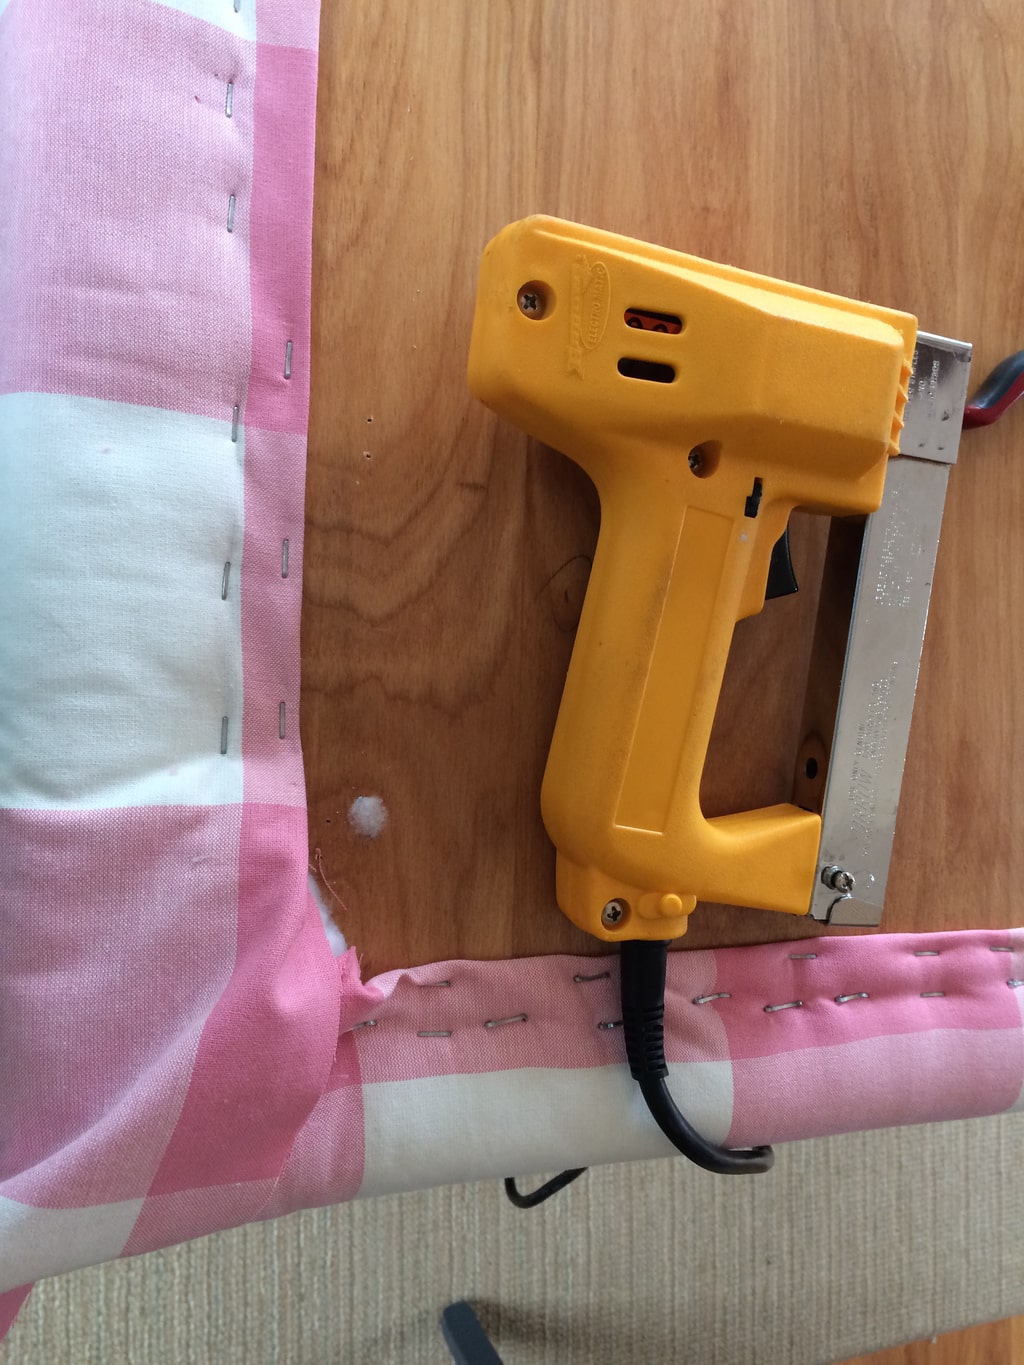
 We stapled the batting to the fabric.

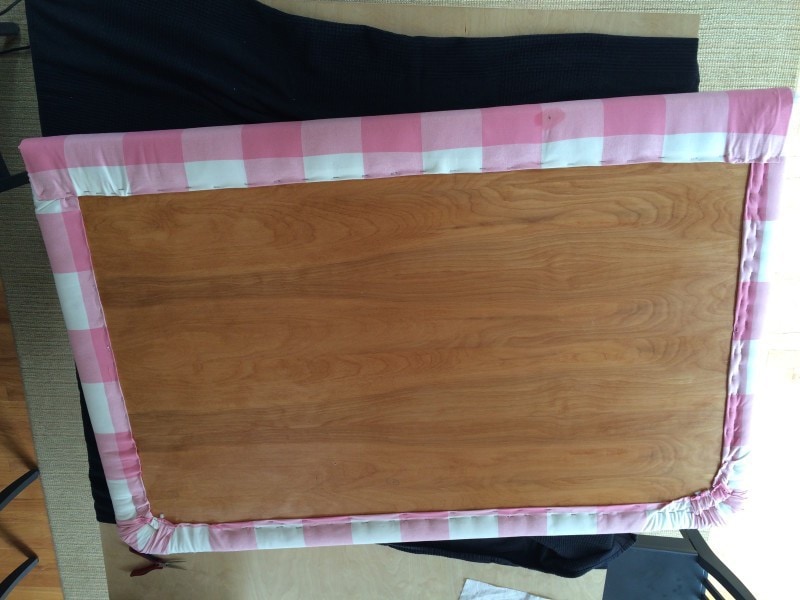
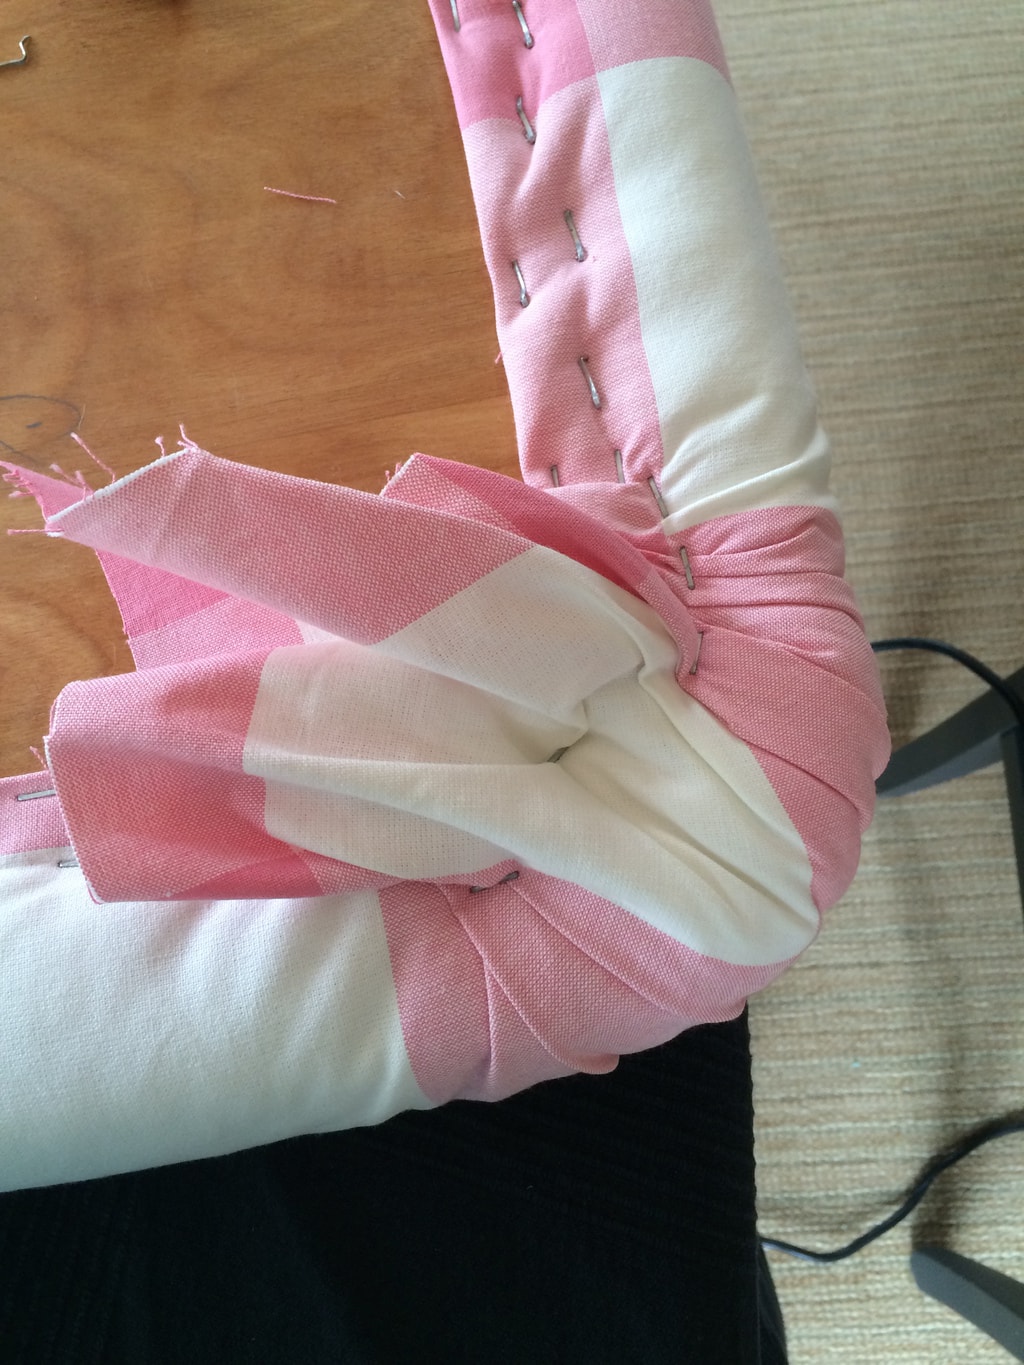
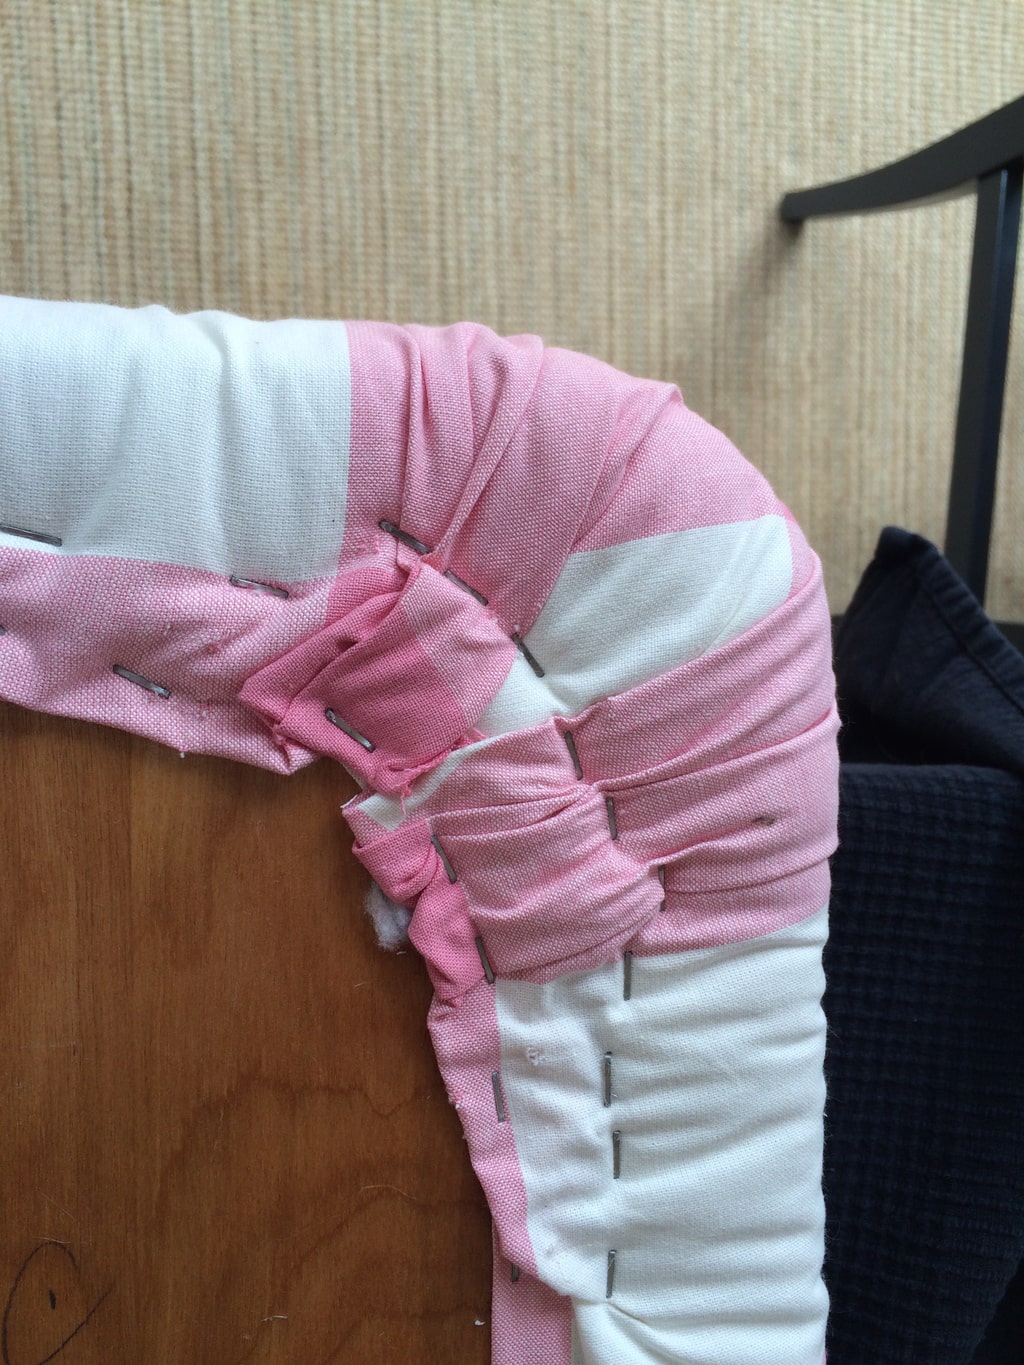
And then we stapled the fabric on top of the batting saving the corners for last. 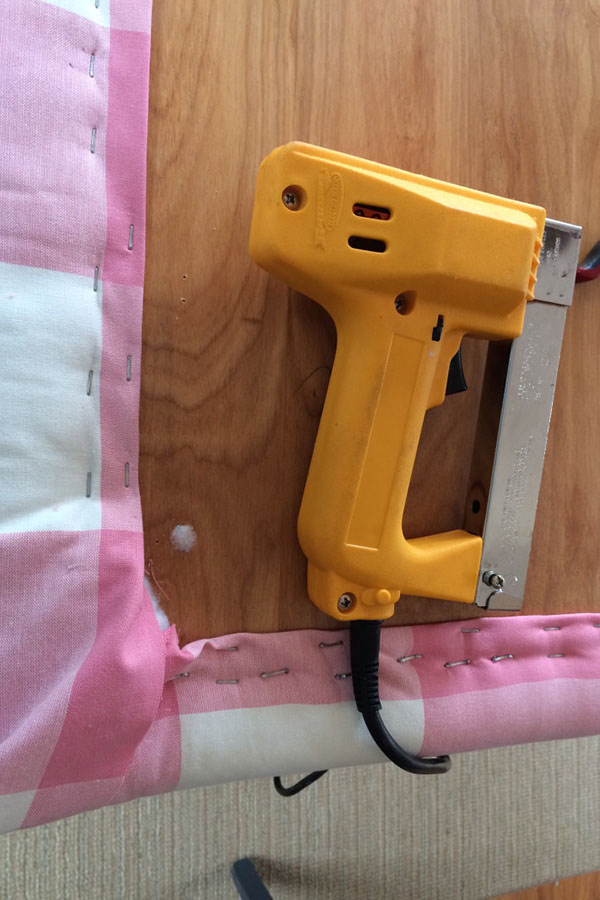

Next, we trimmed the excess fabric on the corners. 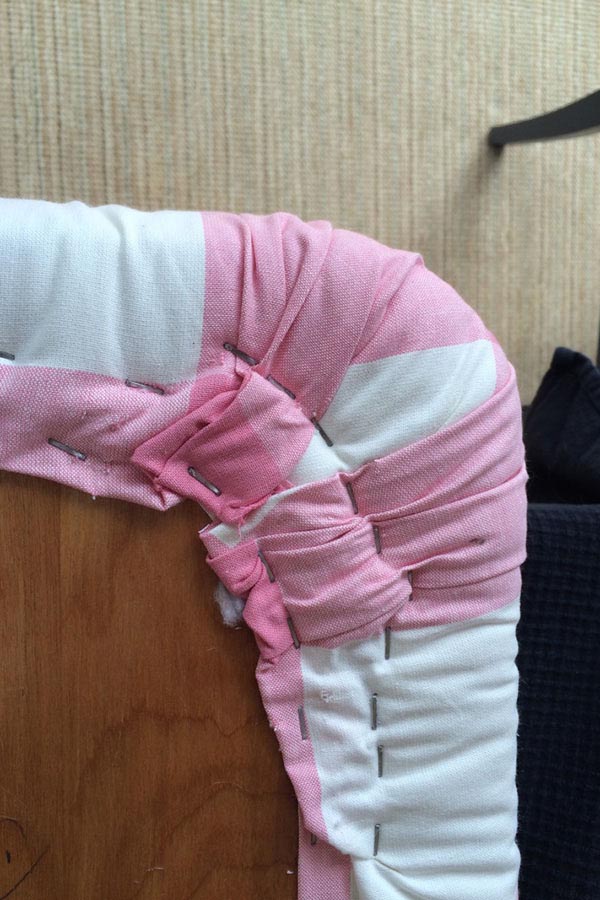
Ready to be hung!
Finally, we were done and we were ready for my husband to hang it when he got home from work. He used a french cleat to attach it to the wall. Please excuse all of the poor iPhone photos–our usual camera lens wasn’t working properly and when you have help for a project you got to do it when you can! We have used a french cleat hanging technique on our headboard in the master and on the mirror in Jack’s room and I am very confident that it is going nowhere since the piece of wood is literally screwed into the studs.
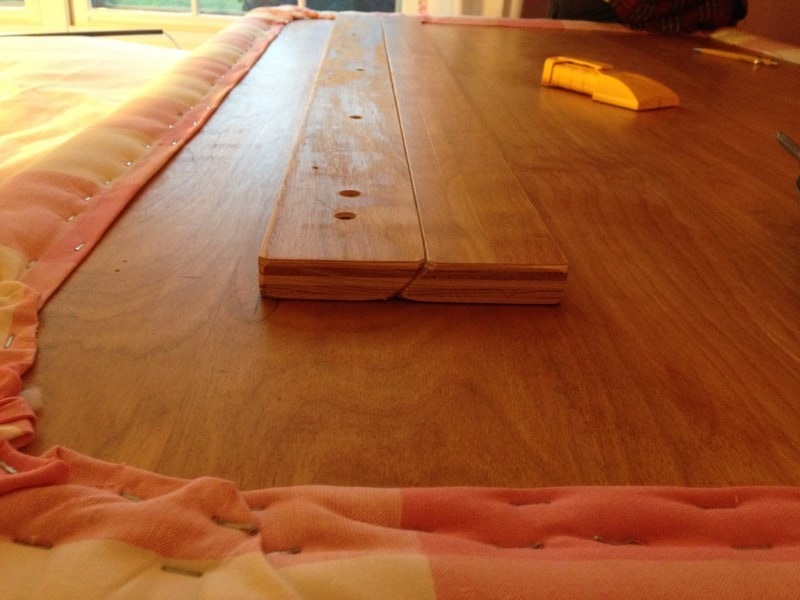
A french cleat shown above. The top board is attached to the headboard and the bottom board is attached to the wall. You can see in the picture above that they nest together. To remove the headboard, one has to lift up first and then out. It is very secure.
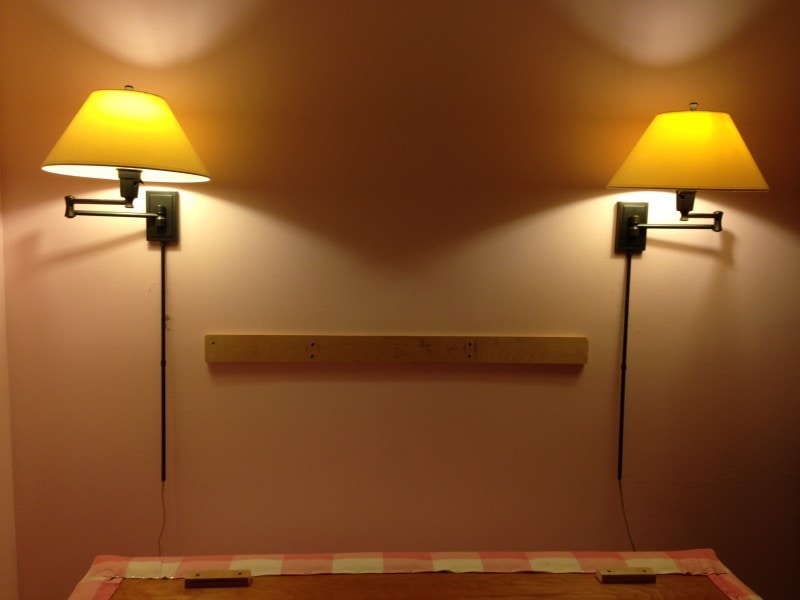 He added some spacers on the bottom of the headboard so it would be evenly spaced off the wall at the top and the bottom (about 3/4″).
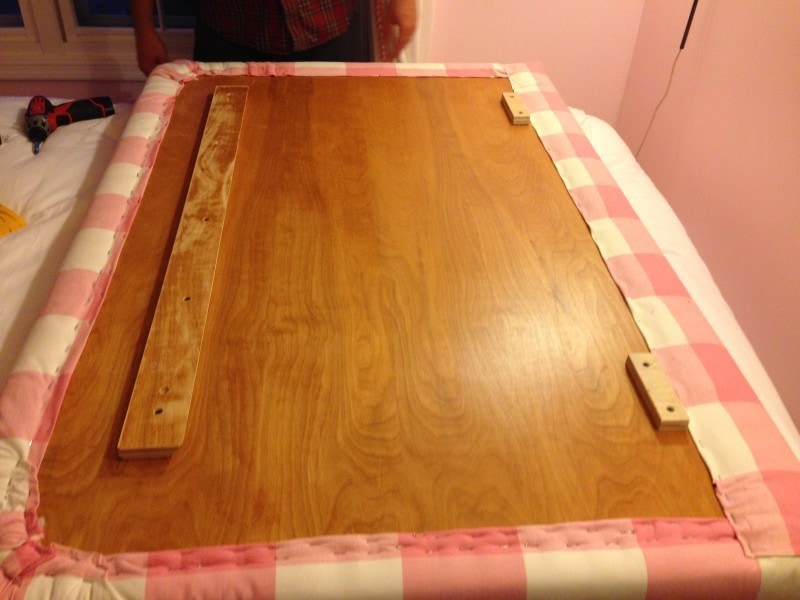 The board is drilled into the studs.
 And voila!

Much better! Have you ever made a DIY upholstered headboard? This one was my first but it was very straight-forward! Please share this post if you like it! It makes my day! And thank you as always for reading! Remember, if you want the FREE PRINTABLE DIRECTIONS, simply click on the button below! It will take you to my free download library!


Hi!
Good job, it’s very pretty. And if you don’t like the lamps there is always spray paint 😉
Greetings from Germany
Jennifer
Hi Jennifer!
Thank you! I love that you suggested spray paint–that is what I said to my husband! He told me to wait on it, but I am thinking if I continue to feel that way then they are definitely going to be spray painted!
xo
Annie
I love it all! Adorbs!
Val, thank you! We love her room as well!
xo
Annie
My little girl would LOVE this room! She loves all things pink and girly. I have been wanting to add an upholstered headboard to my master for a while now. I think I will have to take this tutorial and use it in there. Thanks for all the great pictures. I am a visual leaner so they will help a lot!