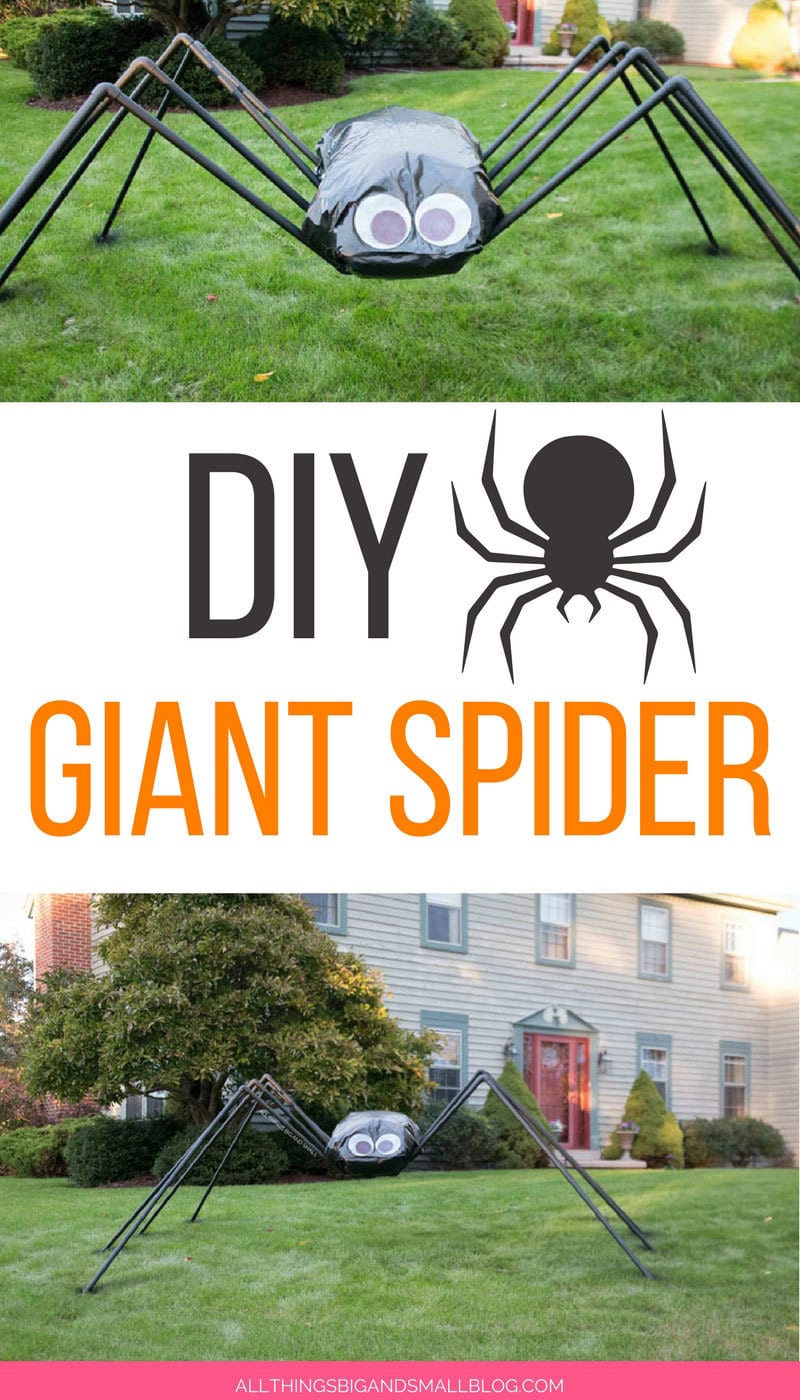
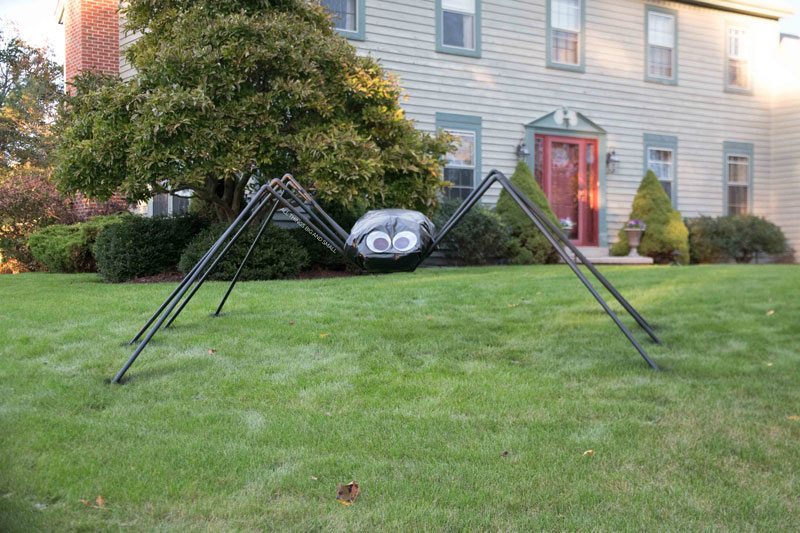
Giant Spider Decoration: How to build a giant spider for outdoor halloween decorations! See this step-by-step guide for how to make fun and scary Halloween decor for the outside of your house!
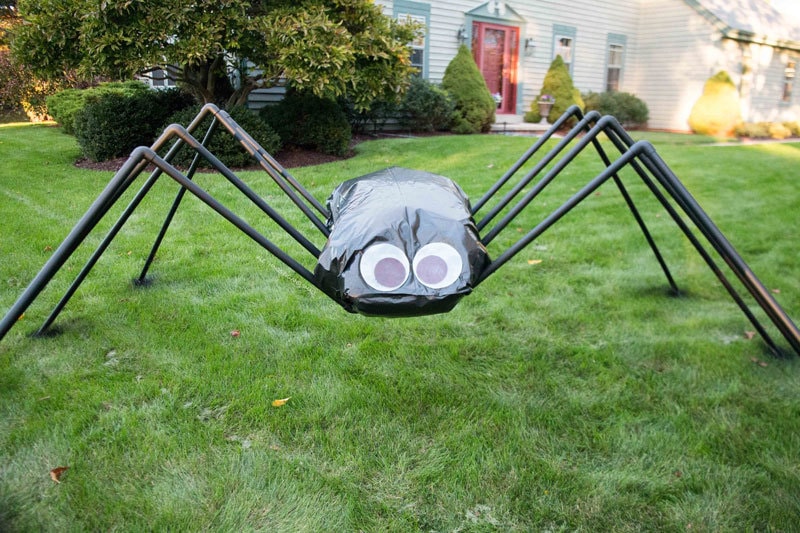
For years, we have said we wanted to make a giant spider for the outside of our house to decorate for Halloween, and this year we finally got around to it! AND IT WAS SO EASY! I really don’t know why we put it off so long! It took us an hour total from start to finish and looks terrific! The neighborhood kids love it and he has already been named Phil by our kids. Yep, Phil the Funny Giant Spider–it has a ring to it doesn’t it?
Now there are already giant spider decoration how-tos out there, but what we wanted to do was create a giant spider that accomplished all of these objectives:
- A friendly silly design vs. a scary design (lots of spiders online that you can find are scary looking) we have little kids and wanted a silly looking spider instead. Obviously you can adjust this spider however you would like to make it spooky or silly.
- Simplified leg joints with minimal fittings and pieces
- The ability to break down the spider and store with only straight sections of pipe and abdomen for easy storage
- The garbage bag body can be replaced each year for free (requiring less storage)

GIANT SPIDER DECORATION – 5 EASY STEPS!
*affiliate links have been used at no additional cost to you. to see my complete disclosure policy read here.
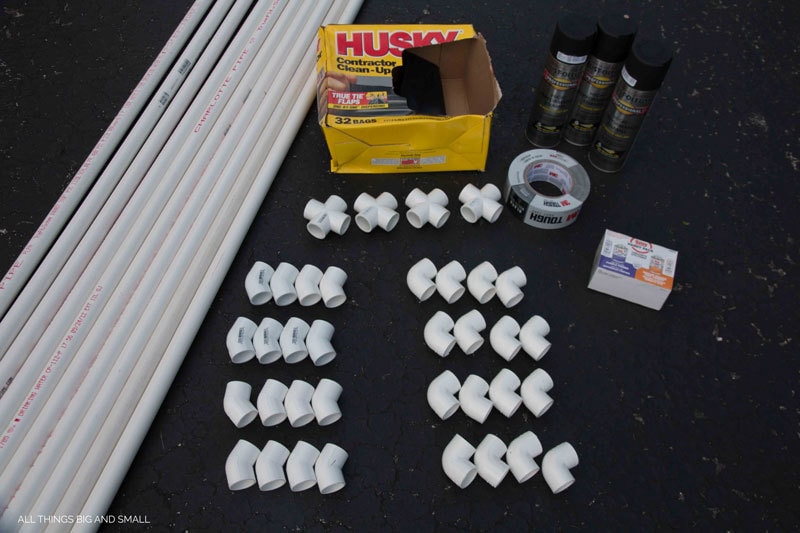
Step 1: GATHER YOUR MATERIALS:
- 3/4″ or 1″ PVC tubing – 7 x 10 ft. lengths
- 90deg. PVC fittings – 8 total (same size as pipe)
- 45deg. PVC fittings – 8 total (same size as pipe)
- Cross PVC fittings – 4 total (same size as pipe)
- PVC primer and cement
- PVC Ratchet Cutter or a saw
- Black trash bag- we used this type of contractor bag
- Stuffing (Leaves, packing peanuts, crumpled paper, etc.)
- 2 cans spray paint– we used matte black
- Black duct-tape
- 120 grit sandpaper
- Measuring tape
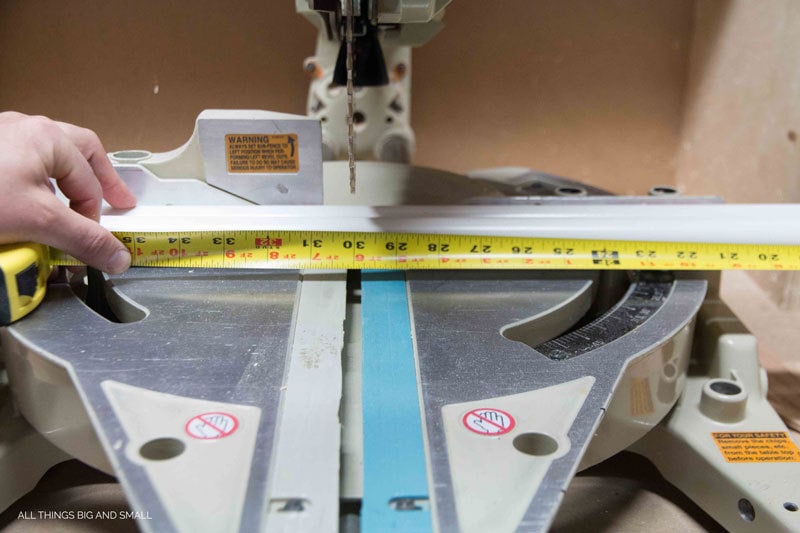
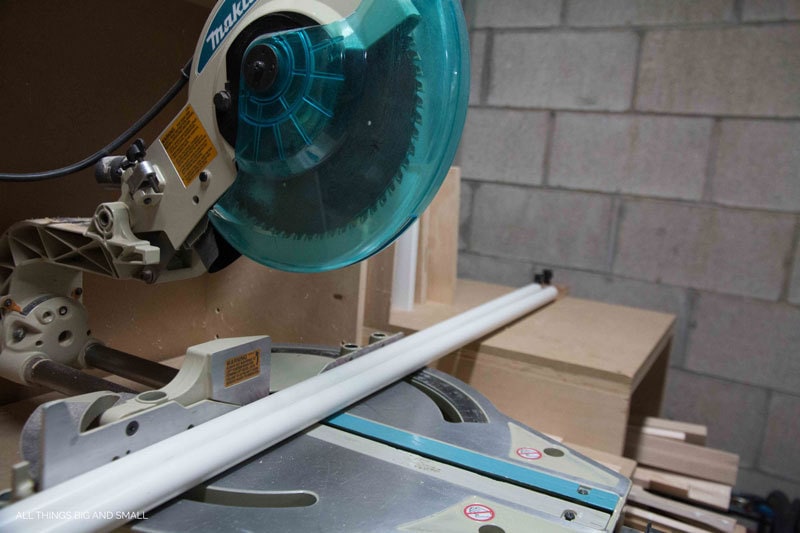
Step 2: Cut your pipes to length
Cutting PVC pipe is easy. Ratcheting PVC cutters work great on small diameter pipe (up to 1-¼in.), are only about $10, and are a pretty useful tool to have around the house – the best part is they don’t make any mess. We couldn’t find ours, so we used our miter saw which worked great. Any hand saw or hacksaw would work also. You might even be able to get someone at the home center or hardware store to cut it for you – doesn’t hurt to ask.
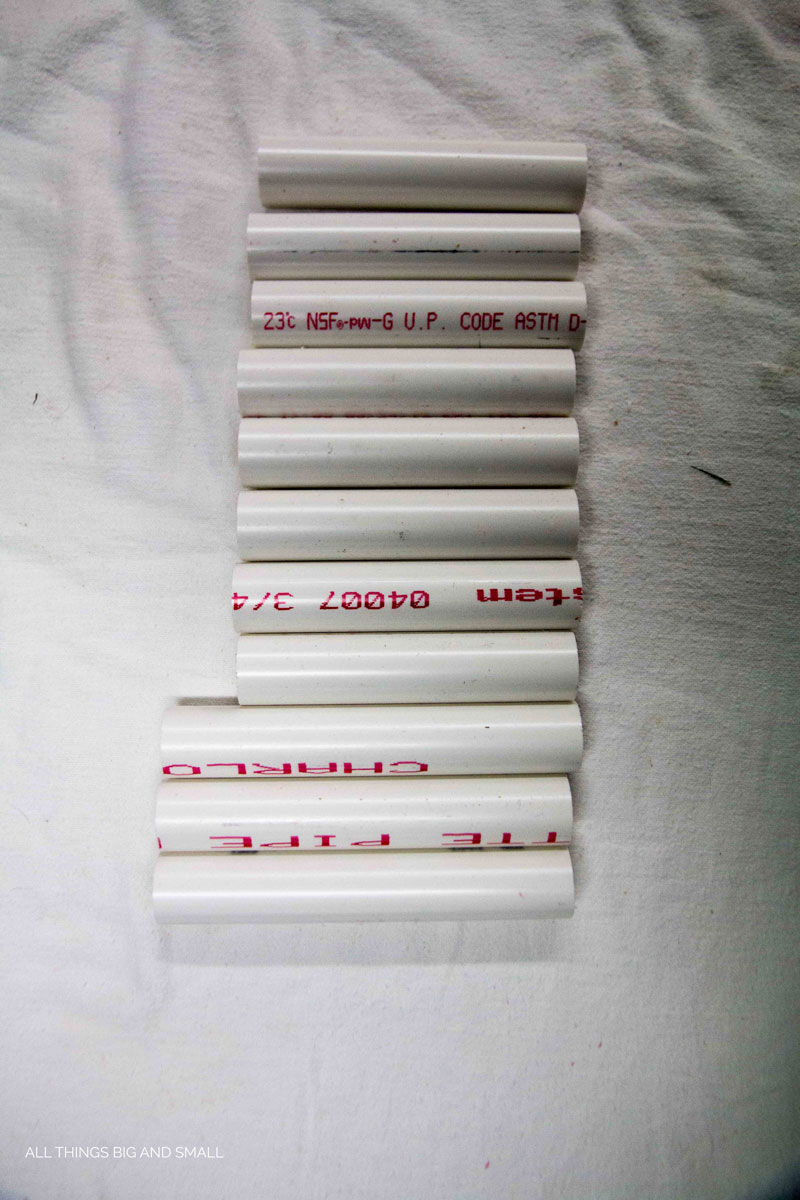
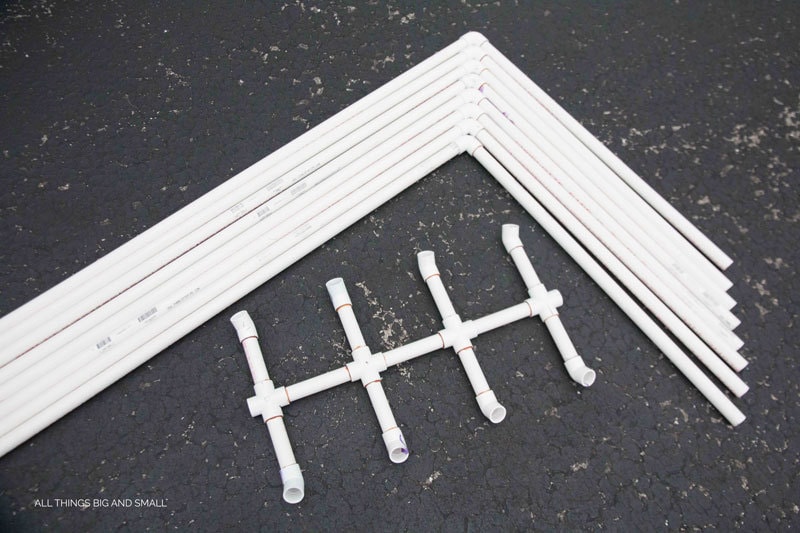
First, take 4 of the 7, 10ft. long pvc pipes and cut them in half so you have 8, 5ft. long pieces. These will be the lower legs. Next, take two more pipes and cut them into 8, 2 ½ ft. long pieces. These will be the upper legs. Finally, out of the last pipe, cut 3, 6in. Pieces for the “spine” and 8, 4in. Pieces for the “ribs”. Take a minute before moving on to the next step to sand all the pipes roughly with 120 grit sandpaper, and wipe them down after with a damp rag- this will help the paint adhere in step 4.
To recap, at the end of this step you will have:
8 x 5ft. lower legs
8 x 2-1/2ft. upper legs
3 x 6in. vertebrae
8 x 4in. ribs
Step 3: Glue!
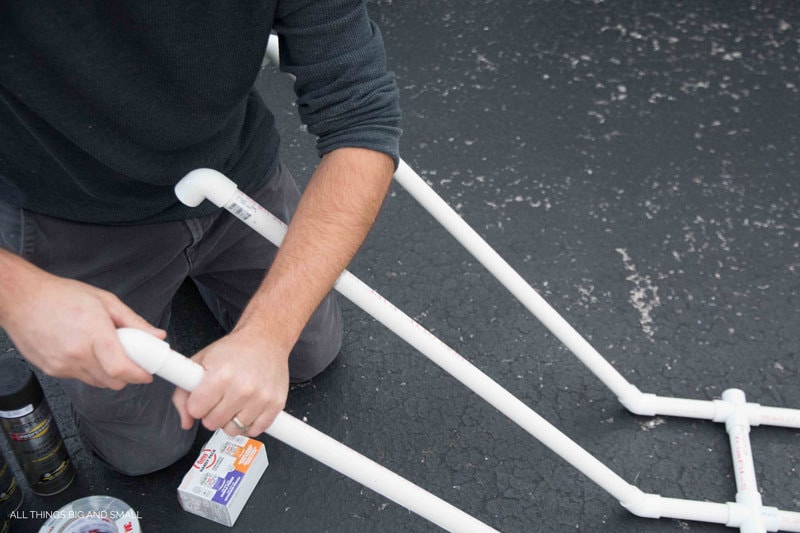
Gluing PVC pipe is super simple. First you apply primer (purple goo) to both sides of the joint (outside of end of pipe, and inside socket of fitting). Then you repeat the process with the cement (orange goo). Finally, you push the joint together with a ¼ or ½ turn – and hold it closed for a few seconds until the cement starts to set.
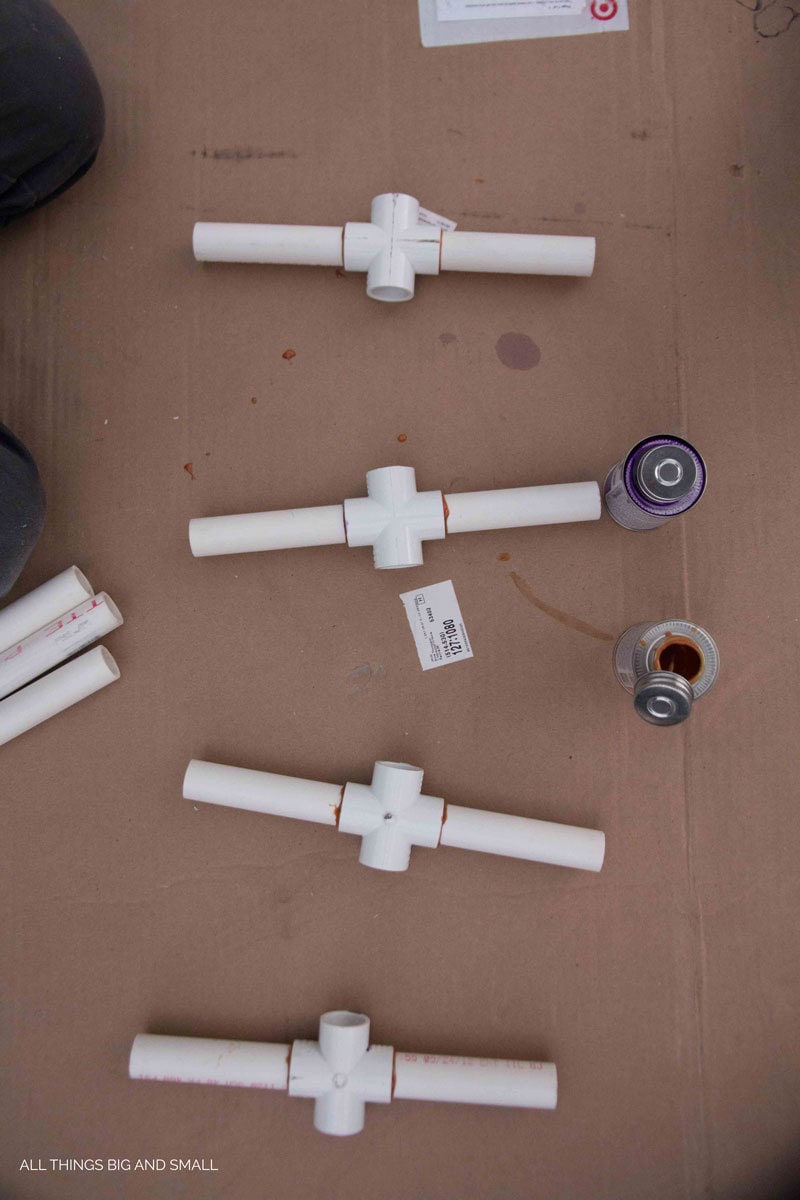
Start by gluing the vertebrae and ribs to the cross fittings. You want all the ribs to end up in about the same plane when you’re done. Next, glue on the 45deg. fittings that the upper legs will attach to. We angled the middle two fittings out a bit, and the front and back fittings a bit more so the upper legs would splay out a bit and look more realistic.
One thing to keep in mind here is don’t worry too much about making all the angles perfect – you’re building a giant plastic lawn spider – not a nuclear submarine. If all the angles are all perfect and too symmetric, the spider will look manufactured, and not natural.
Finally, glue one 90deg. fitting to the end of each upper leg. These fittings will receive the lower legs when you assemble the spider. And that’s it for gluing!
Step 3: Assemble your Spider
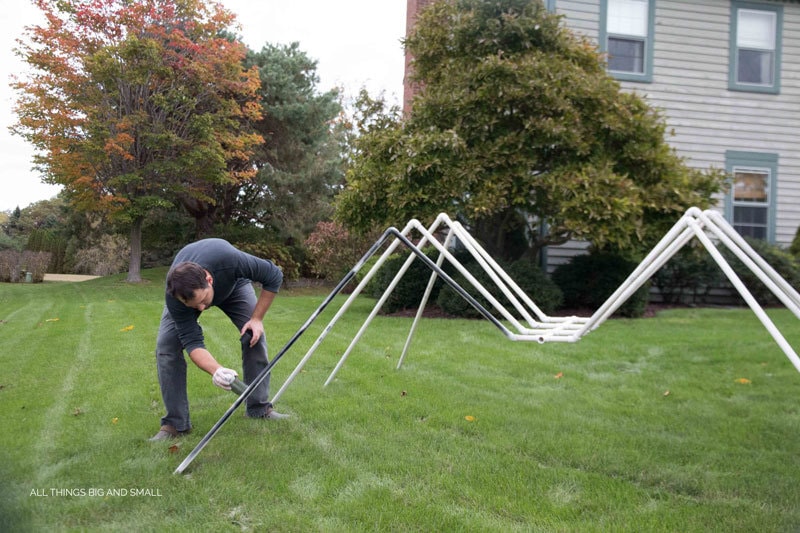
Begin by inserting the upper legs into the 45deg. fittings at the end of each rib. Next, attach the lower legs to the upper legs. Findin a helper to hold the abdomen a few feet off the ground while you’re installing the legs will make this much easier. Also, do this on the grass – not a smooth driveway. The grass will help hold the ends of the legs in place and they won’t slide around like they will on the driveway. Finally, align the angles of the lower legs to your liking and you’re ready to paint!
Step 4: Paint
Once you have the giant spider decoration assembled, you can spray paint all the white pipe black. We used flat-black and really like the way it turned out. It took almost 2 full cans to paint our spider.
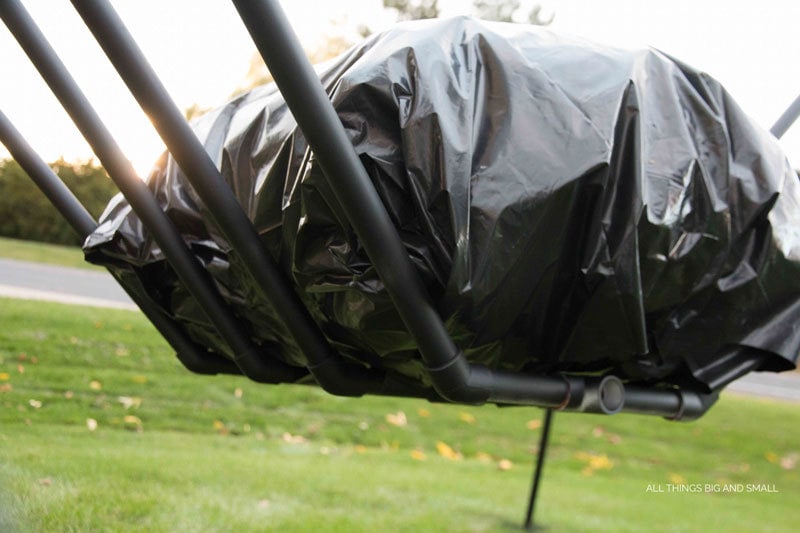
Step 5: Build and attach the body
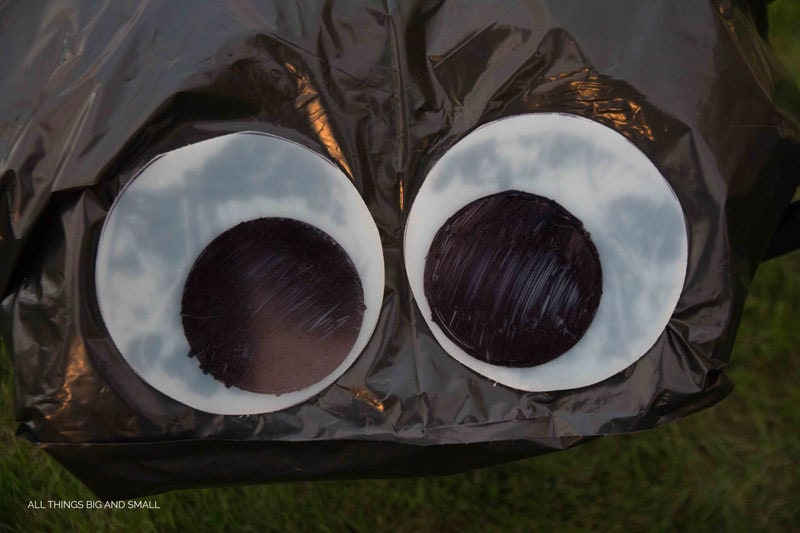
Fill the black trash bag with something lightweight. You could use dry leaves, packing peanuts, or crumpled up newspaper. We took an old space bag and blew it up part way and stuffed that in the trash bag. Next, use the black duct tape to tape the corners of the trash bag down to make it look more like an abdomen and less like a trash bag. Once you’re happy with the shape, tape the body to the ribs and vertebrae. Finally, we attached some large googly-eyes that we cut out of some white plastic – to give it a more friendly, silly look. Et Voila!
Now you have a giant spider decoration that your kids will love–and you can easily pack it up year to year for storage!

You list 8 of each 90/45 fitting but your picture shows 16 of each 90/45 fitting. Can you clarify? Thank you!