How to Decorate a Bookshelf: Do you find yourself ogling perfectly decorated and styled bookshelves on Instagram or Pinterest; but, are stumped as to how to make your bookcases look like them? Lucky for you, I’m breaking it all down including the step-by-step process for styling a bookcase, must-have bookcase decor, and the most common bookshelf styling mistakes!
HOW TO DECORATE A BOOKSHELF
Jump ahead to...
See all the sources for this room here!
One of the things I loved most about our house was the built-in bookcases that flank the fireplace in our family room. It is probably the most photogenic part of our house and the one angle that looks pretty 95% of the time because my kids can’t reach the majority of it. But it wasn’t always this pretty. When we first moved in it looked like this picture below:
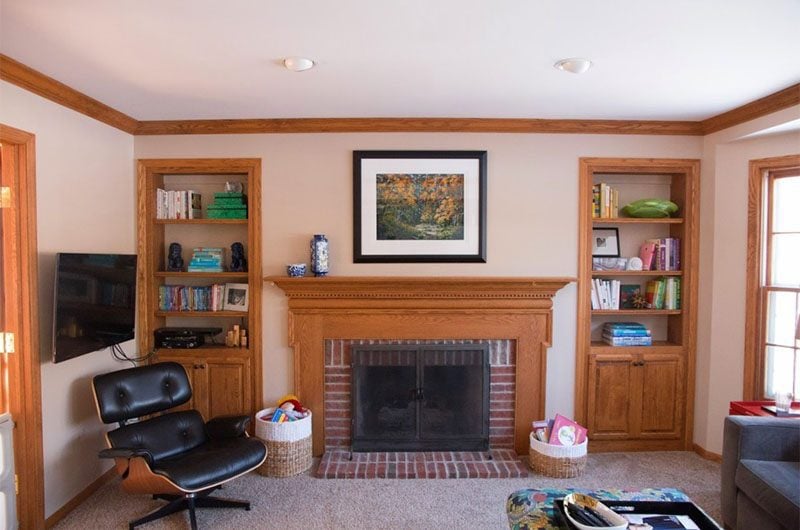
Yeah, we have done a lot to the room since we moved four years ago: namely painting the wood trim, painting the brick fireplace, painting the walls White Dove, making a DIY gold mirror, and decorating the shelves.
Along the way, I’ve picked up some decorating tips that will help anyone style their bookshelves which I’ve shared below.
STEP 1: ARRANGE YOUR BOOKSHELF BY COLOR
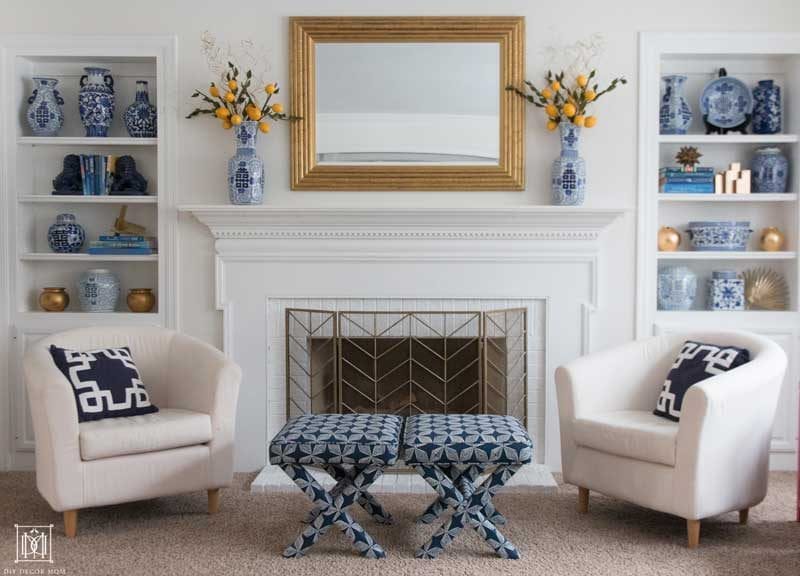
Select the colors you want for your bookcase. They should tie into your room’s color scheme (when in doubt limit it to three!). You can see for our bookcase the three colors are blue, white, and gold. You can see how it looked before (when we just moved into our house–there were too many colors with the green and the black, and it looked too busy!) Now it looks much better–less hodgepodge more sophisticated collection!
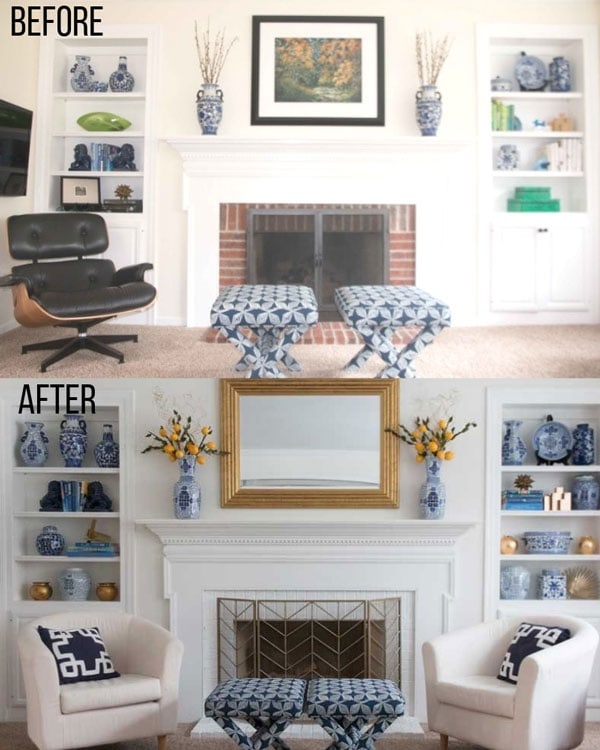
Next, group your books according to color.
Your husband will roll his eyes; but, trust me they will look much more cohesive! This is such a quick tip for any bookcase, and even if you don’t want to do any of the rest, do this and I promise you will be happy with the results! You can see how on our bookcase, I only used books with blue backbones. I phased out the green ones and hid them elsewhere.
STEP TWO: PUT LARGEST DECORATIVE OBJECTS IN
Next, start out with the biggest pieces you own. These are going to be the focal point of your bookcase. Try to balance out these pieces. You can see below that put my biggest blue and white jars on the top shelves and made it symmetrical (for the most part.)
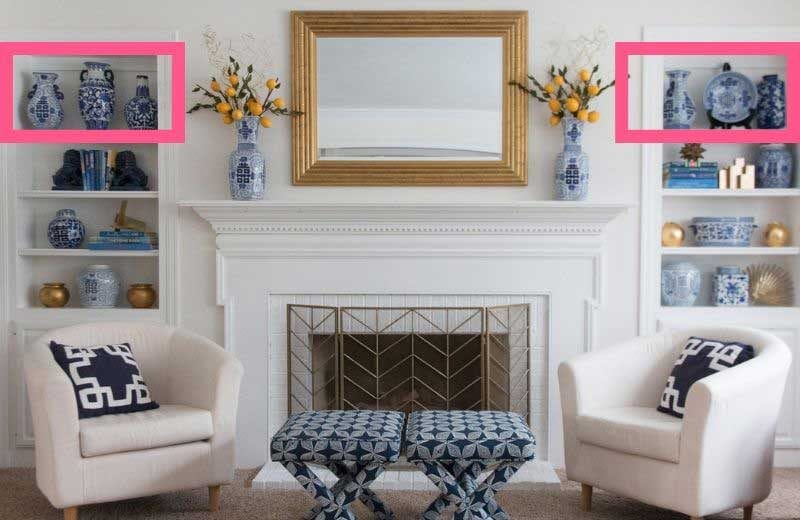
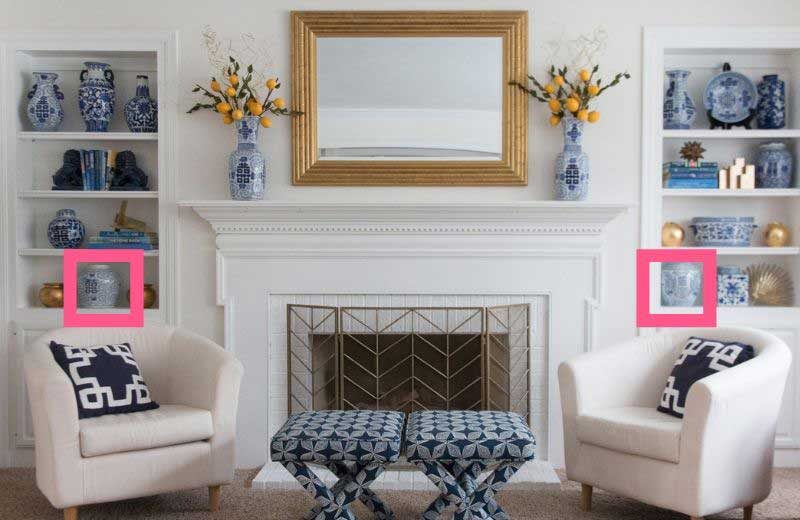
I also put the large ginger jars on similar height shelves below, so you can see how they balance each other.
Then, I added the middle vignette of a ginger jar, next to a stacked shelf of books.
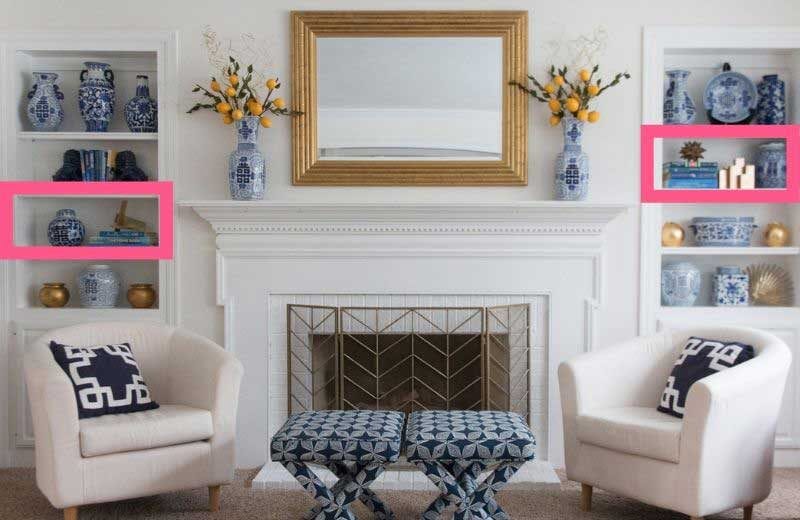
Then, I made the symmetrical arrangement of a blue and white piece flanked by two gold pots. I alternated the shelf placement so it looked more organic.
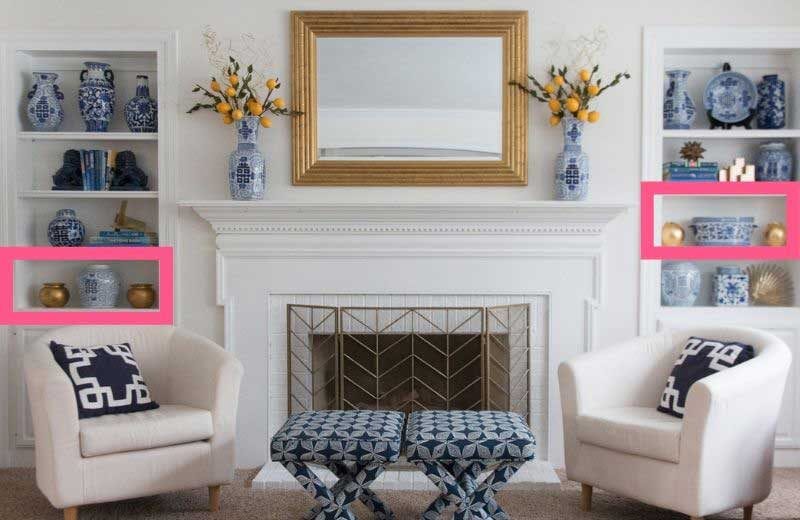
It definitely took a little tweaking, and wasn’t right off the bat; but, by doing it step-by-step, it was an easy process.
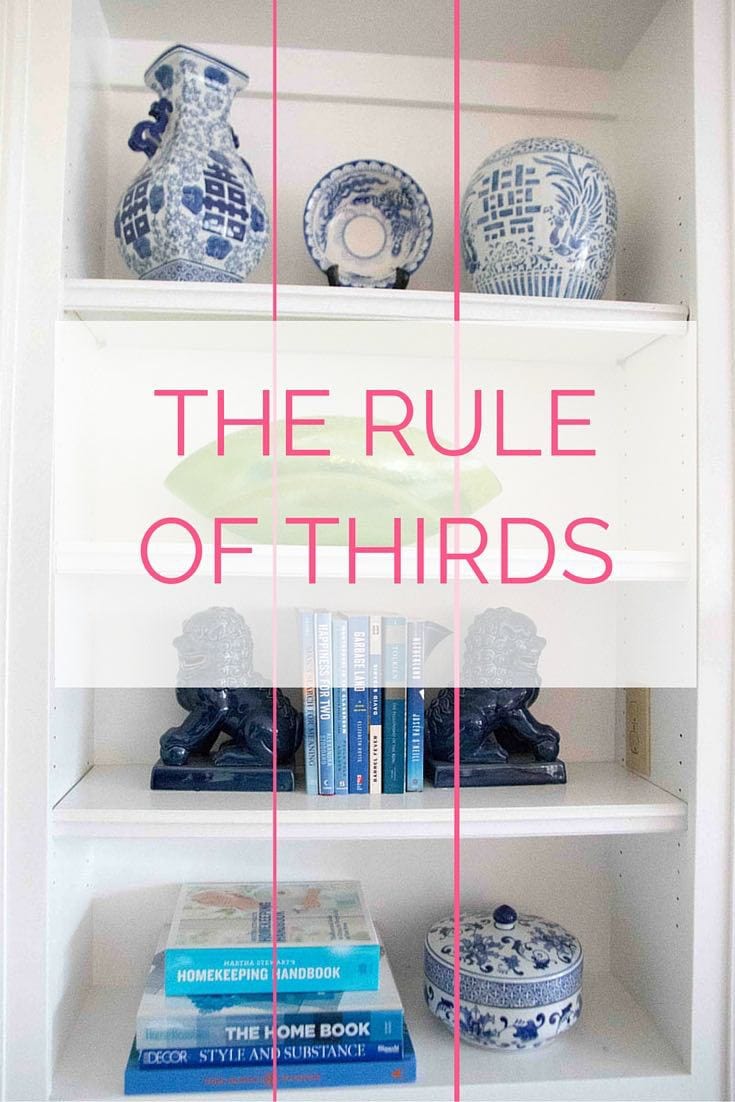
DECORATING TIP: Use the rule of thirds when putting objects on your shelf. Each shelf should be broken down into thirds. You can see how it loosely fits in this super old photo below. The stacked books take up about 2/3 a shelf, and the pottery is all about 1/3.
STEP THREE: ADD METALLICS OR NATURAL TEXTURE
Then, I went in and added little gold touches on the tops of stacked books, or where there were holes. You can see above, that I use a lot of gold. I don’t necessarily use a lot of natural or textural pieces in this vignette, which is just personal preference. However, there is a lot of gold which takes the place for texture.
DECORATING TIP: If you are looking for a less formal arrangement, consider adding in some small woven baskets and some wood tones.
STEP FOUR: ADD LIVING OR FAUX GREENERY
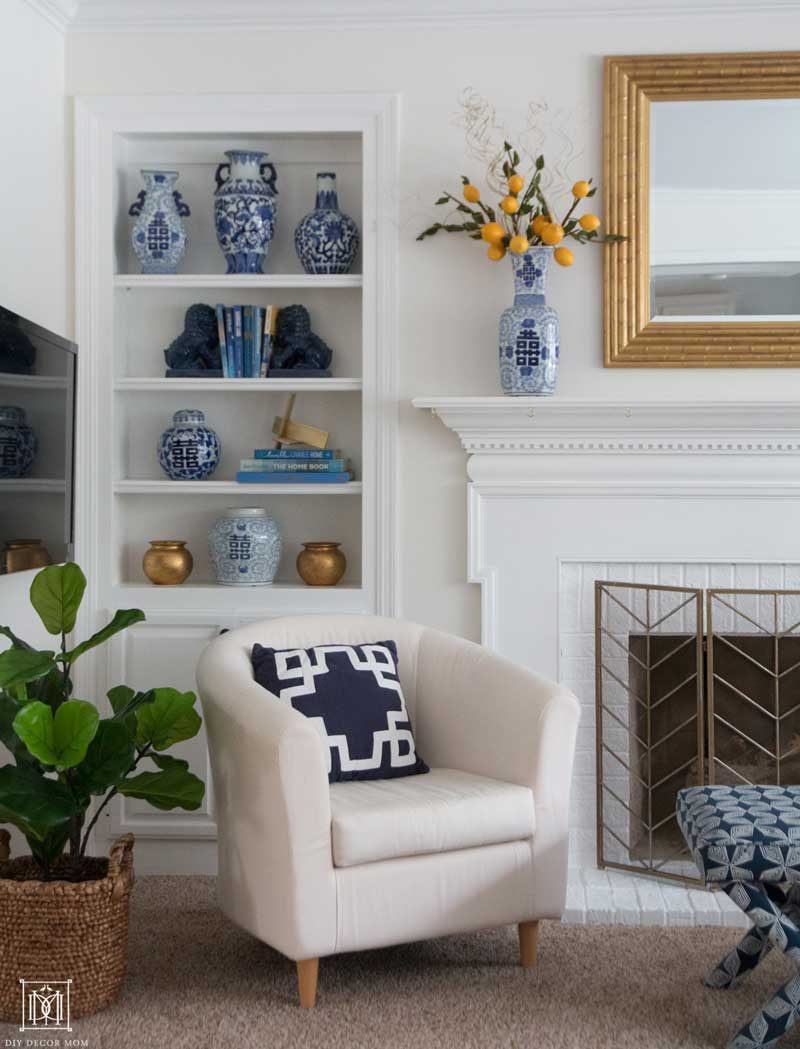
Finally, you want to add some life to your bookshelf vignette. In the first photo below, you can see that I had some dried pussy willows in two blue and white jars flanking the mirror. By replacing it with something more lush and colorful–the faux lemon branches, it breathed life into the stale built-ins. I then added faux lemons to the inside of the ginger jar bowl to bring a little more color and life in there.

Personally, I am a big fan of faux flowers (see my favorite faux plants here) I work hard enough to keep my kids and dog alive–I don’t need to care for anything else 😉
But, if you have a green thumb, integrate some lovely houseplants, air plants, or succulents into your bookshelves. This will give your decorated bookcases an organic look.
TROUBLESHOOTING DECORATING BOOKSHELVES
If you are having trouble with styling your bookshelves, step back from the project. Take a picture of the shelves on your iPhone, and go into the other room, and take 10 minutes. Looking at it with fresh eyes on a screen will help you have perspective. You want to take in the bookshelves as a whole and not shelf-by-shelf.
If you feel like the shelves are too cluttered, they probably are. Less is more–and I know that sounds hypocritical because I often say layer your decorative accents; but, it’s true. If you feel like it’s just too busy, it probably is.
BOOKSHELF DECOR MUST-HAVES
*This post contains affiliate links at no cost to you–see my complete disclosure policy here.
There are several bookcase decor components that any vignette should have: Click on the post below each to see my favorites!
- Best Faux Plants
- Best Decorative Objects
- Storage Baskets (if necessary–these can hold remote controls, kids card games, and little trinkets that you don’t want out.)
- Large books of one color (or two)
HOW TO DECORATE BOOKCASE 101
To summarize, here are the key components to decorated bookshelves:
- Identify and arrange key color groups on your bookshelf
- Start arranging objects, beginning with your largest pieces–finish with the smaller accents. Embrace symmetry and the rule of thirds.
- Add in metallics and natural textures (woven baskets, boxes, and trays)
- Add in faux greenery or real plants
- Assess and re-assess (take a step back and look at it through your phone camera.) Make any necessary adjustments.
Decorating bookshelves is a process. In all likelihood, you probably will end up tweaking the arrangement two or three times. But, this method should get you 95% of the way there the first time!
Remember, homes are meant to be lived in. They tell the story of your family. Your family didn’t happen overnight and neither will decorating your home. Take it step-by-step with incremental improvements over time (heck, that’s the only way we can manage to do it!)

